Dates & Oats Energy Bites

No Bake Date and Oats Energy Bites

Energy Bites

My best friend sent me a picture of my co-workers getting into a habit of eating healthy breakfast at work a few days back. The picture had them bringing breakfast jars to work.

It all started with me sharing my overnight oats jar, with a dear colleague one morning. It got us talking about how easy it is to put together this breakfast option. Like I say healthy need not be boring!
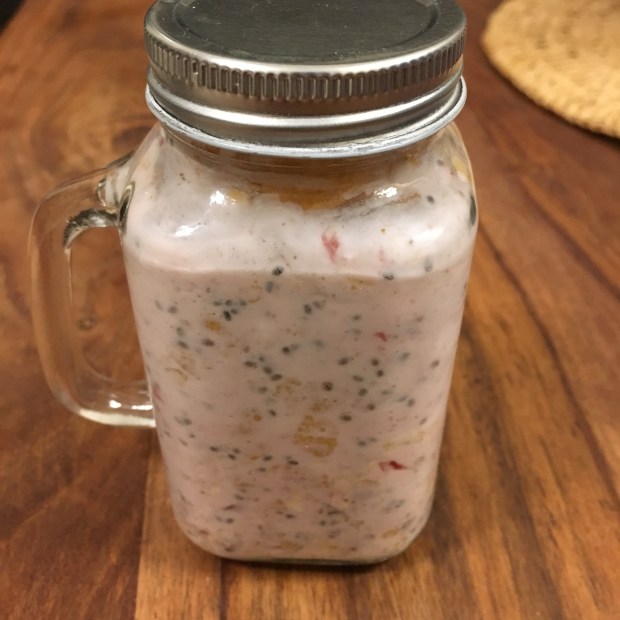
Overnight Oats2

Overnight Oats 

This is for you Sho and MJ, thanks for waking me up from my blog-slumber and reminding me why I love sharing recipes in the first place. Also Palla, without your persistent nudge I would have not written a word this weekend.

So no promises of being regular out here posting recipes. However I would do my best juggling a hectic full time job and a new gym subscription.

Well, the past few months have been quite exciting. I have tried making many lifestyle changes, few have take shape and few are work in progress. More on that soon!

I have not bought white sugar in the last 4 months, given up white rice, tried some exotic ingredients (mac powder, cacao nibs, chia seeds, wheat germ, matcha powder and so on)

Along with thus I have hopped on the bandwagon and made these date-oat energy bites, best decision ever!

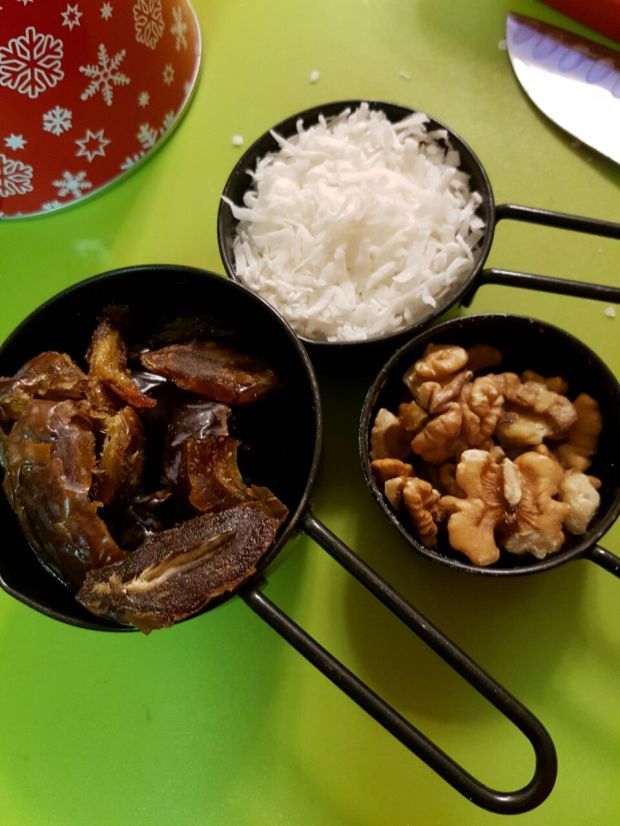
It’s got simple ingredients which come together quickly to get this moorish bite. I made mine with Medjool dates, oats, dried coconut flakes and walnuts, great source of dietary fibre and protein.

I chose Medjool dates on purpose, they are a good source of fibre and essential minerals. I also like their caramel like taste.

Ingredients

Ingredients

Ingredients
1 cup pitted medjool dates
1/2 cup unsweetened coconut flakes
1/2 cup rolled oats
1/3 cup walnuts
1/4 tsp cinnamon or more
Himalayan pink salt to taste
Little water to help blend everything together

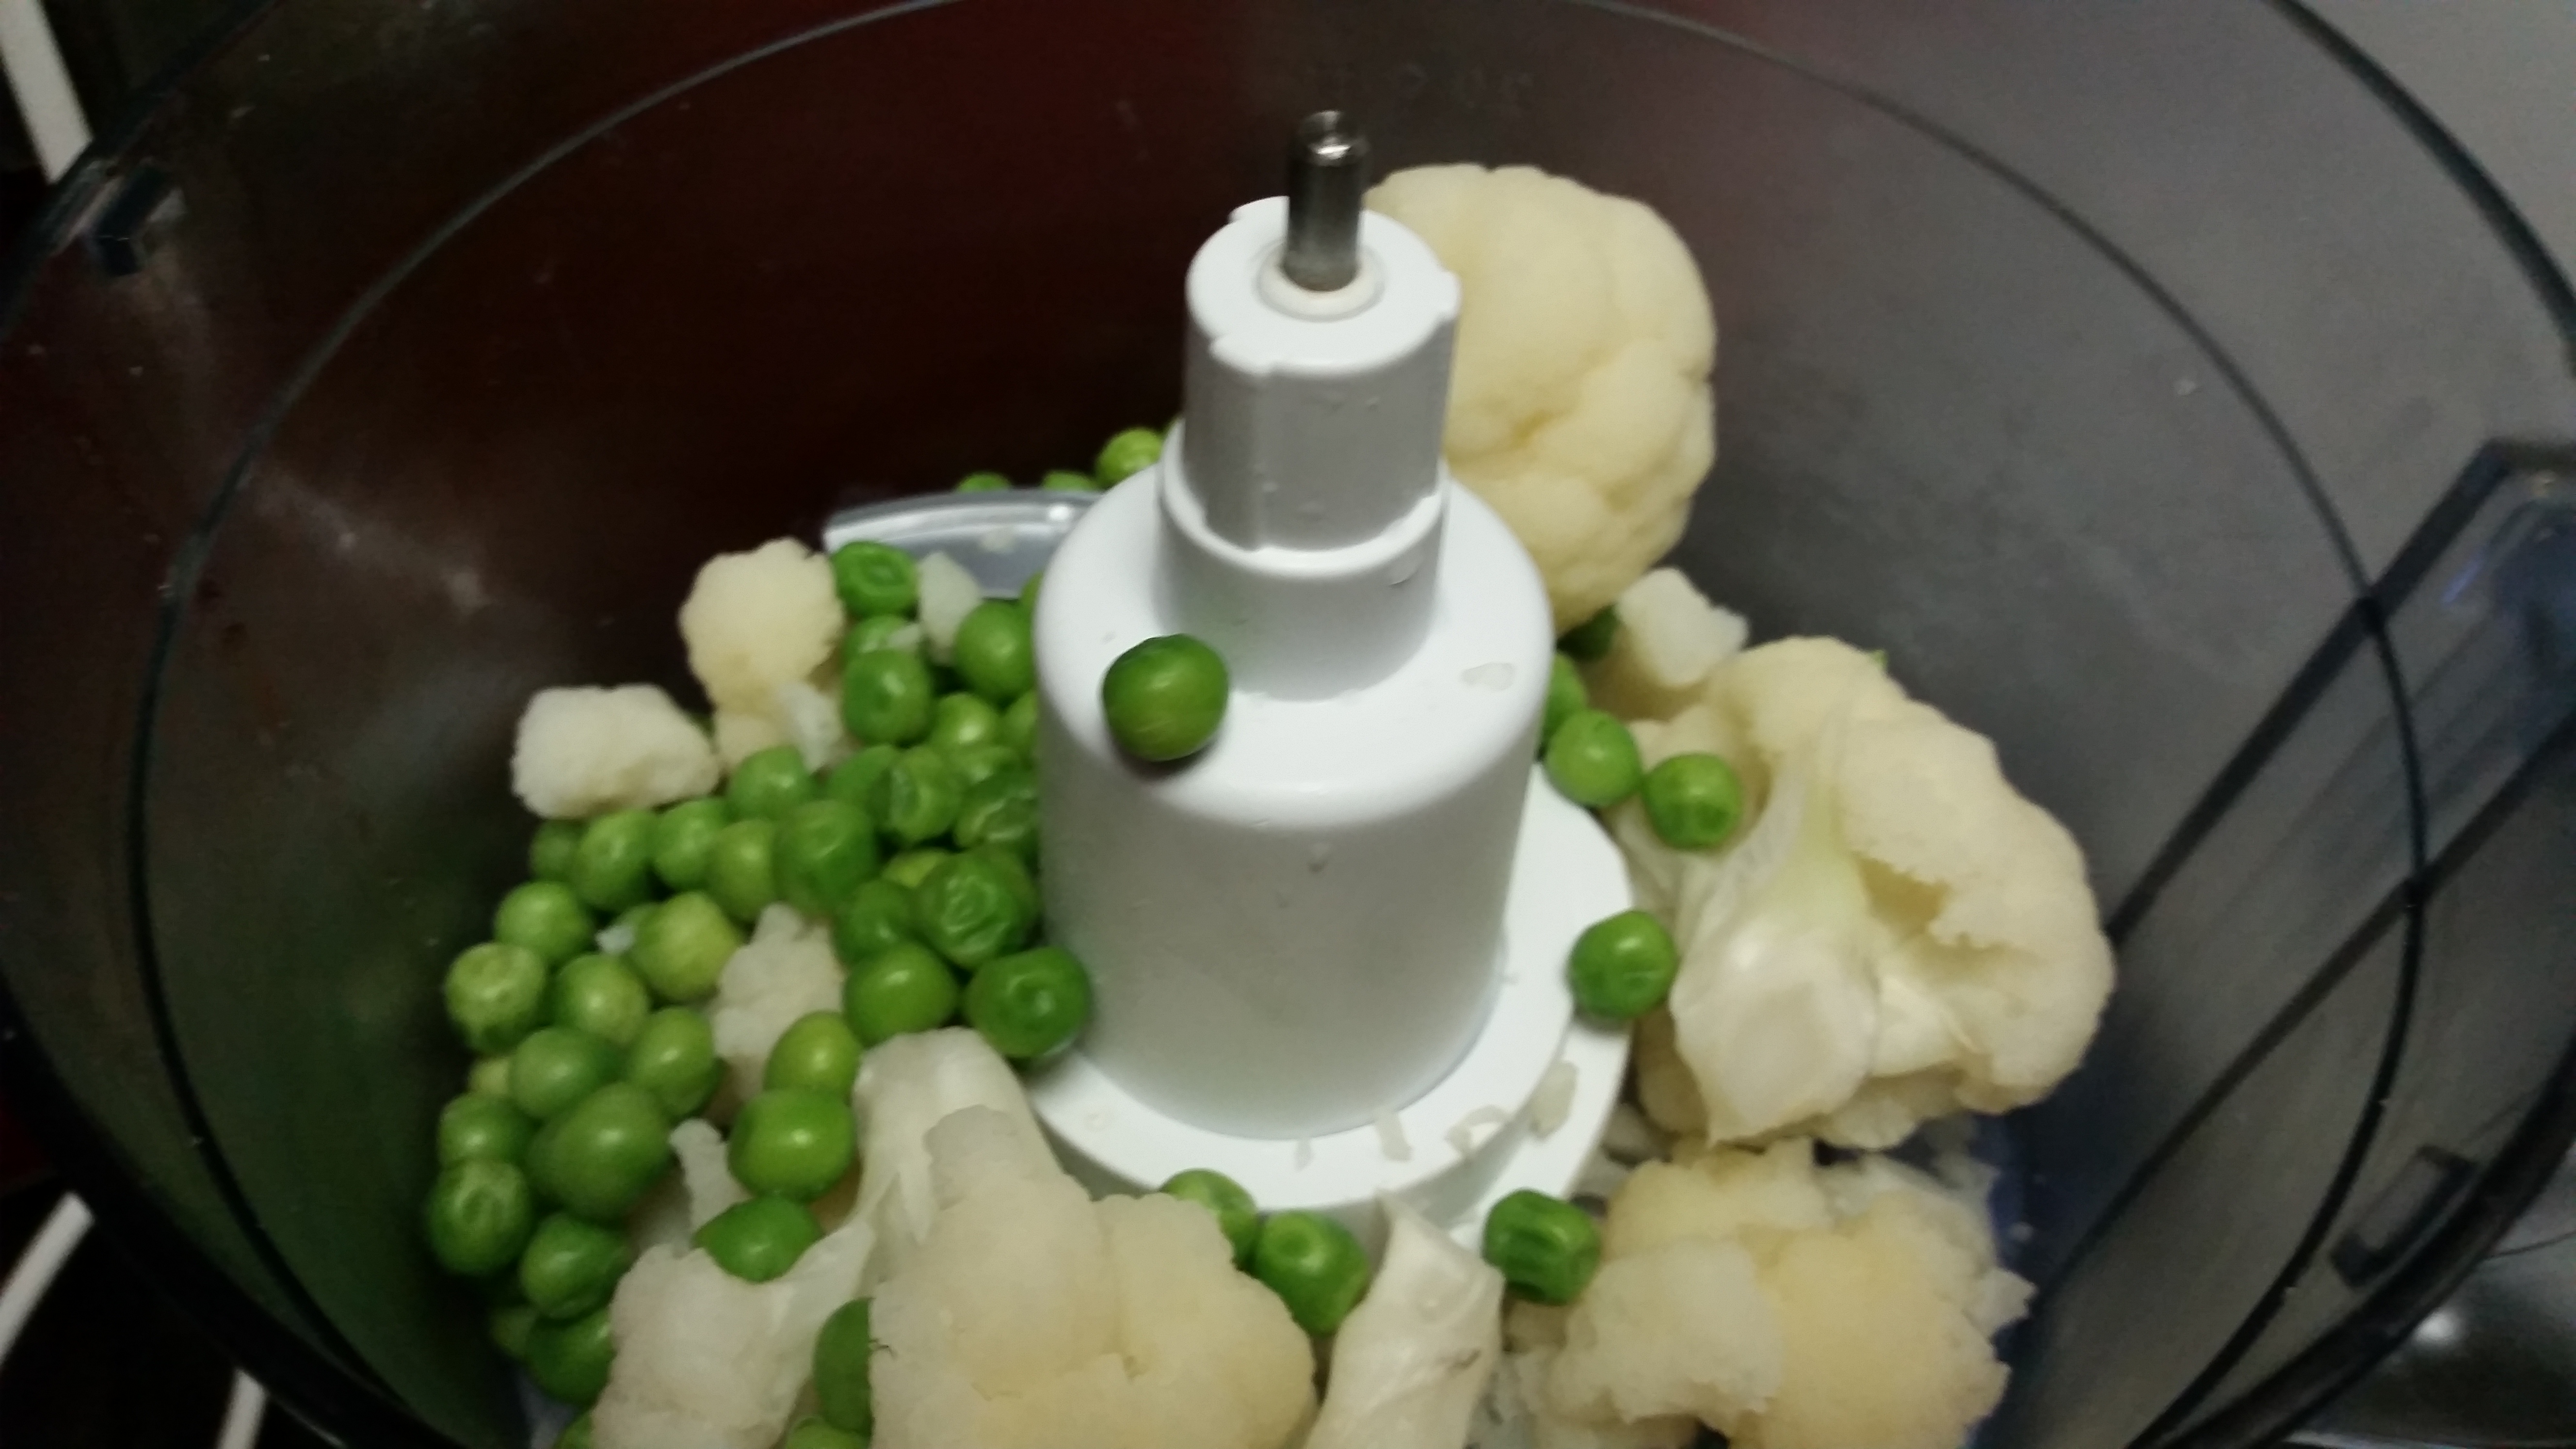
Pulse all ingredients together in a food processor for 3-4 minutes. You should have a fine paste.

Remove the mixture in a plate. Grease your palms lightly with any neutral oil or simply dip them in cold water. This would prevent the mixture from not sticking to your hands.

Now take a tablespoon of the date mixture and roll it.

Once you shape it like a small ball, roll only the one side in unsweetened coconut flakes.

Energy Bites

Voila! You got yourself some pretty looking pre or post workout snack to munch on. This recipe should make about 12 bite sized portions.

Store it in an airtight container in the fridge for a week. Pack these in your lunch box, here’s the His&Her edition of lunch boxes in our household. Sahil was very happy to carry these to work!

Lunch Box

What are you usual pre or post workout snacks ? Do let me know!

Paneer Tikka / Shashlik

My first post for 2016 had to be a special one. New Year’s eve for me and Sahil is mostly at home. We either host a family dinner or a house party with close friends. Once it’s closer to 11pm, we step out and drive around to catch a glimpse of the breath taking fireworks which has tourists from world over flock to Dubai.

This year however we were in mood for something outdoorsy. Josh, my colleague suggested we join him and my other work mates for a camping trip. On a side note, Josh is also a founding member and lead vocalist / guitarist for the popular Dubai band Candy Flippers. Go follow them because they are aaaahhhmaazingggg!

We settled for a BBQ themed camping trip in Ras Al Khaimah desert. The build up to the new year’s eve was amazing as well. After endless banter on a common Whatsapp group and 4 trips to the hypermarket we were well stocked.

Desert

It was fun going to the mall looking for camping supplies since this was my first camping experience in the desert. It was magical to say the least!

I was in-charge of catering to the vegetarians in the group. I decided to go for Paneer Shashlik, Veggie burgers with caramelised onions, roast potato pouches and grilled assorted vegetables.

Here I am sharing the recipe for Paneer Shashlik or Paneer Tikka.

Ingredients
2 1/2 tsp tikka masala
1/2 tsp garam masala
1 tsp cumin powder
2 tsp coriander powder
2 tsp chaat masala
1 tsp dried mint
1/4 cup fresh mint / kasuri methi
1/2 tsp red chilly powder
Pinch of turmeric
750 grams paneer / cottage cheese cut in cubes
2 red peppers cut in squares
2 yellow peppers cut in squares
2 capsicum cut in squares
2 medium red onions cut in squares
400 grams greek yoghurt
3 tsp ginger garlic paste
salt to taste
50 ml canola oil
1 tsp kasundi paste
1 tsp carrom seeds
2 tsp chickpea flour / besan
1/2 tsp red chilly powder
Salt to taste

In a mixing bowl, whisk greek yoghurt and add tikka masala, ginger garlic paste, coriander powder, garam masala, cumin powder, turmeric, chaat masala and dried mint and mix well.

Heat oil in a pan and add carrom seeds. Once they splutter, add kasundi paste and red chilly powder. Let it cook for a few seconds and add chickpea flour.

Keep stirring continuously on low heat until the mixture gets some color. Take it off the heat and pour over the yogurt mix.

Blend the mixture lightly and add the paneer, onions and peppers and coat it evenly with the mixture. Refrigerate for at least 2 hours.

Once you are ready to cook, you can start assembling the paneer tikka on a skewer.

If you are using the bamboo ones, make sure you soak them in cold water beforehand so that they do not burn when placed on the hot BBQ.

I decided to go for the stainless steel BBQ skewers given they seemed sturdy and could make more servings of the paneer tikka in one go. Also they last you many BBQ trips, I got mine for AED 8 for a pair of 4 from Carrerfour.

Now let’s get on to the assembly part, you begin by oiling the skewer well. Add one cube of red pepper followed by one cube of yellow pepper, then one cube of capsicum and lastly one cube of onion and one cube of paneer. Follow this for step for the rest of the mixture on hand.

Place it on the hot BBQ, it takes usually 15 minutes for the skewers to get cooked. Keep turning the paneer skewers after every few minutes so that all sides get some color evenly. Once it is evenly browned, remove the paneer and veggies from the skewers and serve with spicy coriander mint chutney.

Paneer Tikka
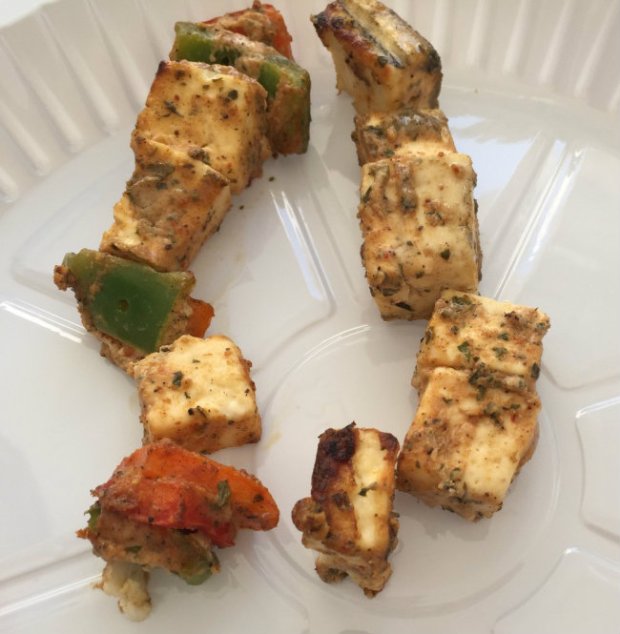
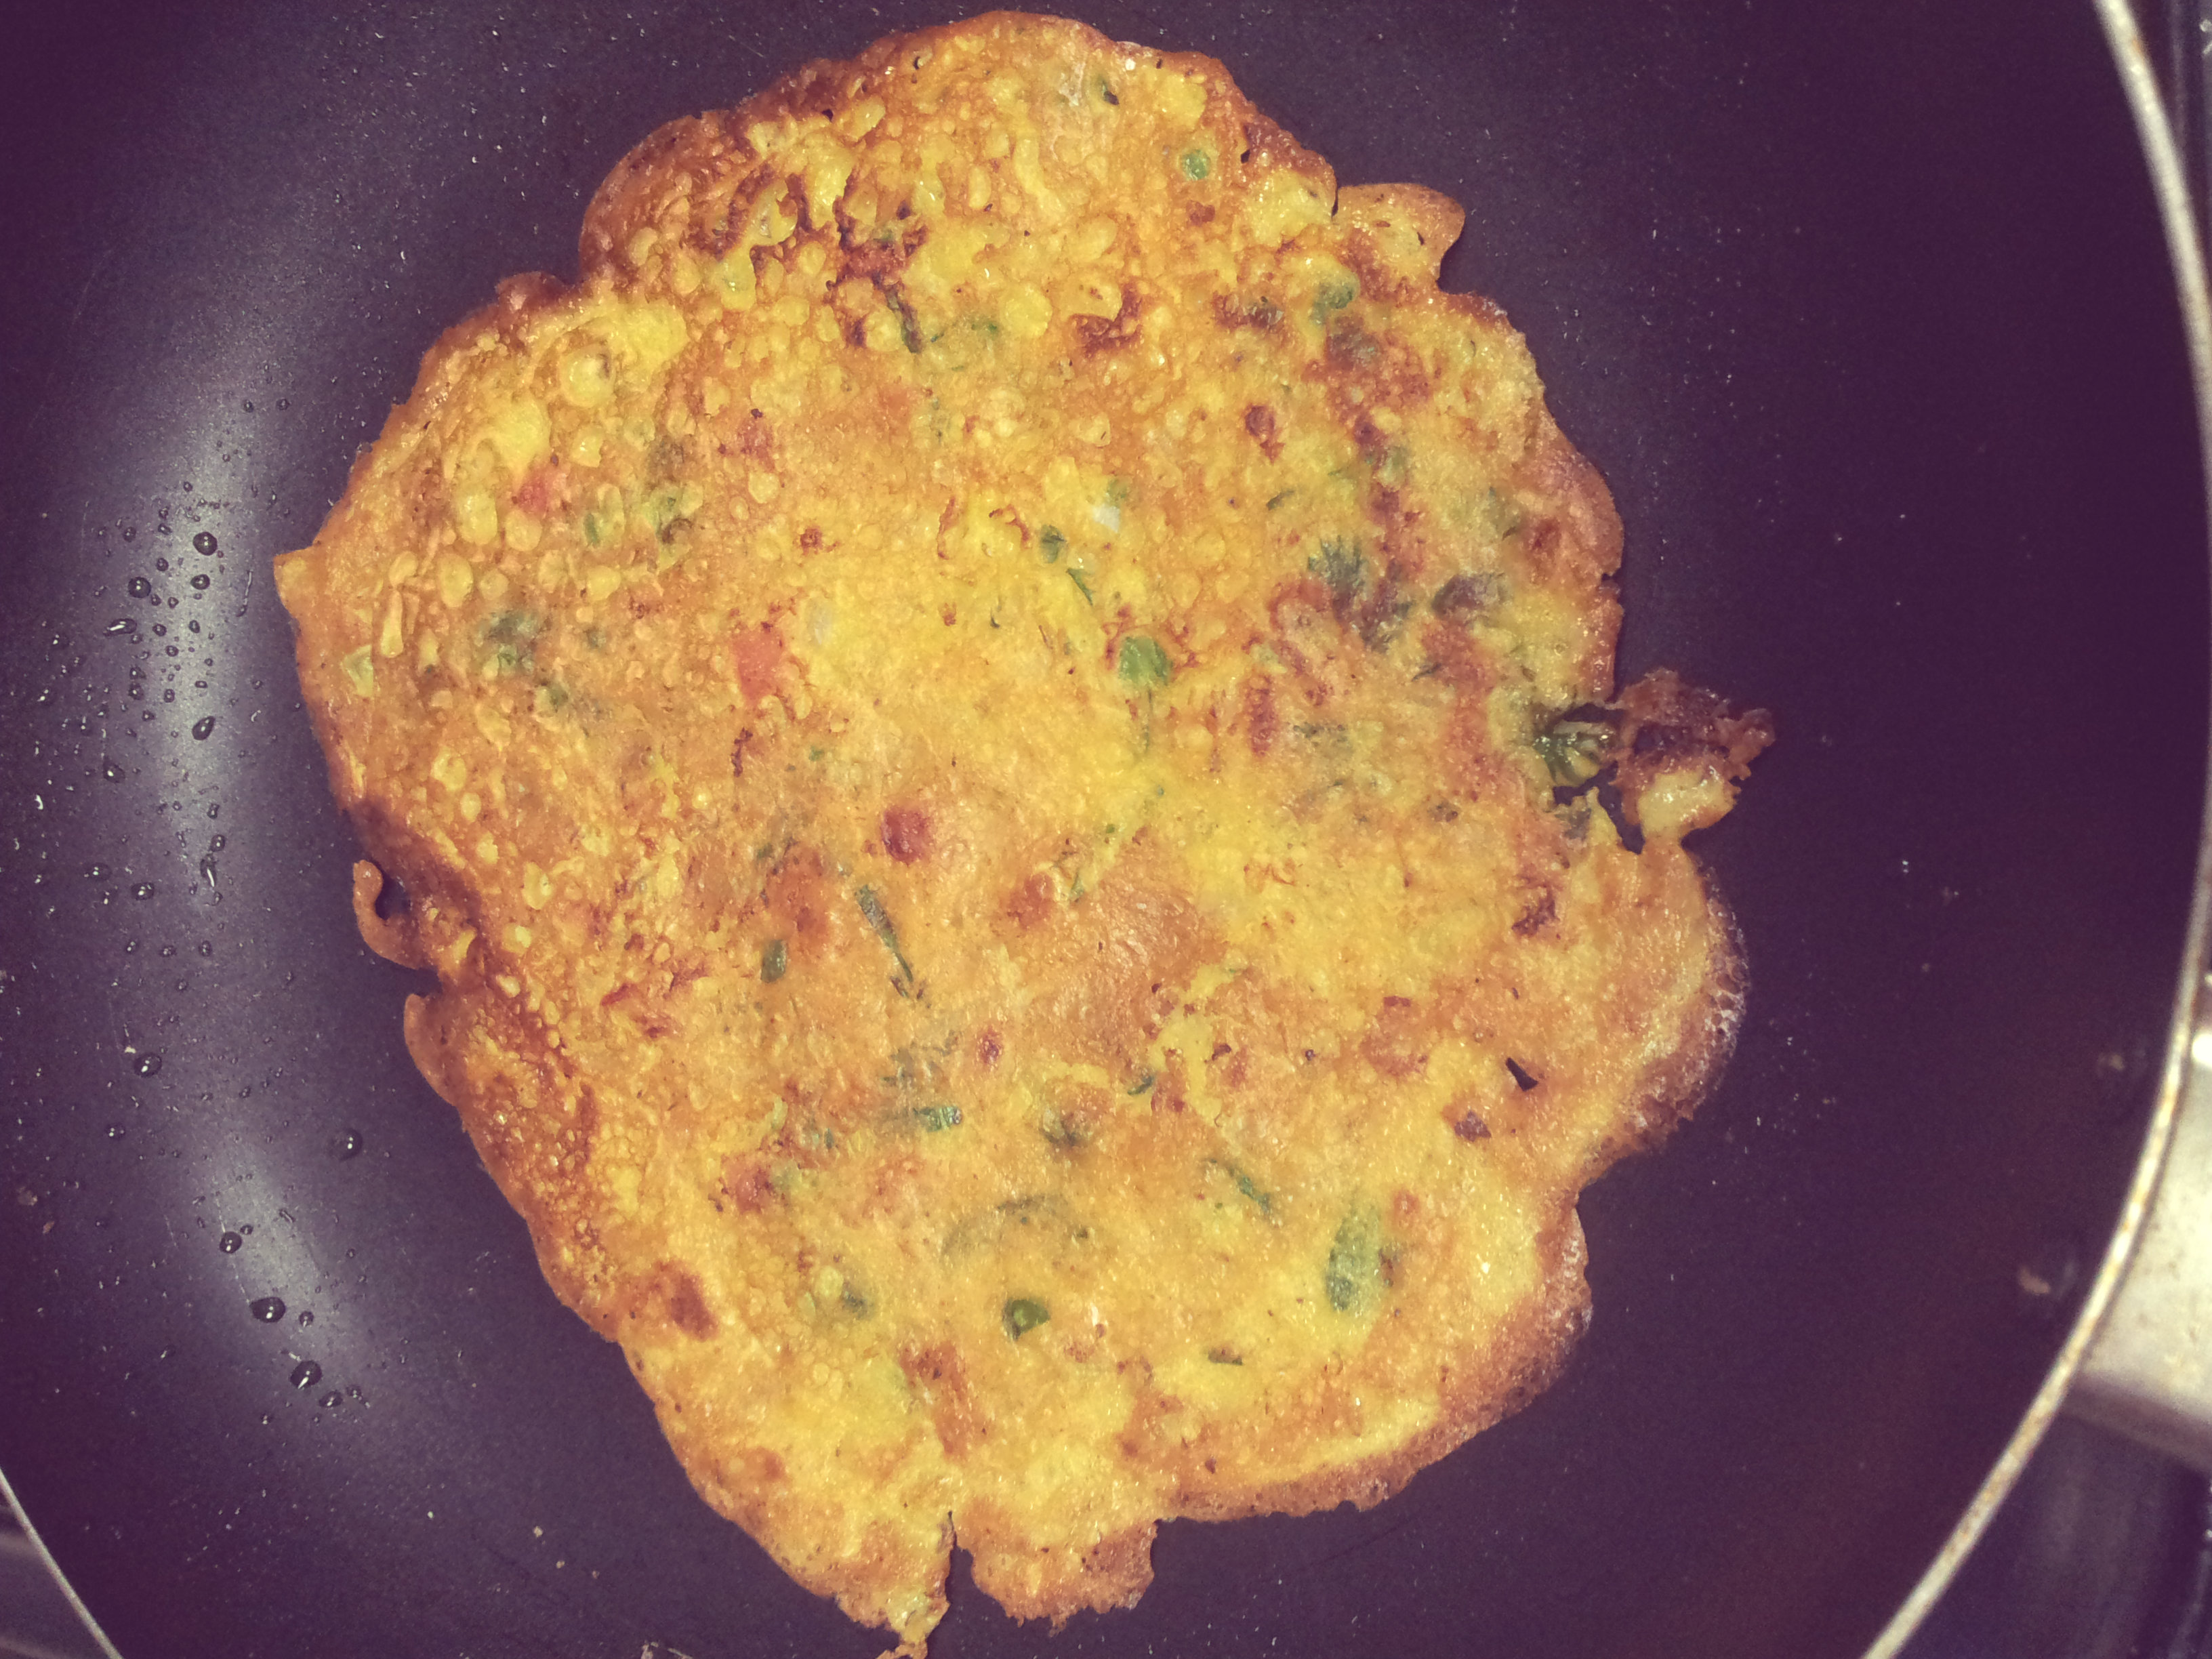
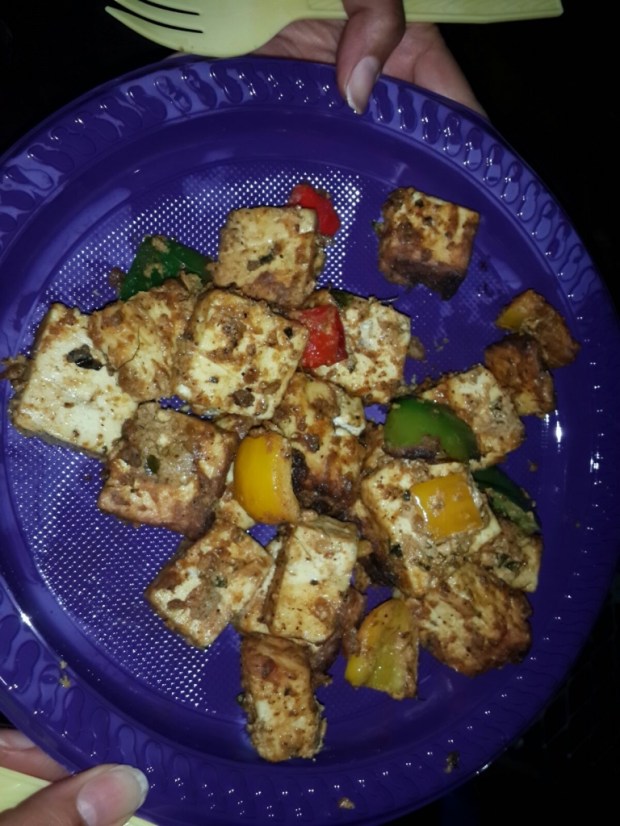
Unfortunately I do not have good pictures for the dish however this did taste good and the recipe will be a bookmark for any other BBQ parties I host.

I had used the same recipe before, here is a better picture I have from that BBQ party.

Paneer Tikka 1

However I did make some changes to the recipe and this post includes my revised version.

Do try it sometime and let me know if you like it!

Somewhere in the middle of a desert, cooking on the BBQ, under the stars, next to the bonfire and tents set up, listening to some guitar and have an ensemble croon to melodies. Too much was happening around however I felt a sense of calm and happiness. This is how we welcomed 2016 and hope this be the best year yet for us.

Wishing everyone here as well a great 2016!

Oats Vegetable Tikki

Oats Tikki

Oats Vegetable Tikki 

I am a huge appetizer fan and usually love to serve a variety whenever I have dinner parties or friends over for chai.

On one such occasion, I served this crunchy on the outside and soft on the inside tikki. Patties, cutlets or tikkis are a staple snack in Northen parts of India. Aloo Tikki is mostly featured in the appetiser section in most Indian eateries and serves as a base for many chaat items.

Move up towards western India and Mumbai has aloo tikki’s popular cousin Ragda Pattice. The spicy chutneys the tikkis are usually served with make it a medley of flavours. Sweet, tangy, spicy and crunchy what more would you need!

These are fairly quick to assemble and make and perfect way to use up leftover boiled potatoes. Since I wanted to feel less guilty, I added some oats and vegetables to them. Adding oats also helped up the crunch factor in the tikkis.

Cooking Time : 10 minutes
Serves : 4

Ingredients
1 cup rolled oats + 1/4 cup ground oats
2 potatoes boiled and mashed
2 tsp coriander powder
1 tsp cumin powder
2 tsp dried mango/ amchur powder
1/4 tsp paprika powder
1 tsp minced ginger
2 green chilled finely chopped
1 red onion finely chopped
2 carrots grated
1 tsp wheat bran
1/4 cup bread crumbs
2 tsp finely chopped coriander leaves
Salt to taste
Canola Oil for shallow frying

Grind the oats. In a bowl, add all the ingredients and mix them well.

Now with greased hands, make 12 equal portions and roll out in flat tikki (cutlet) shape.

Dust them in a plate with equal portions of ground oats and breadcrumbs.

Shallow fry on each side until they acquire a even brown color. Serve immediately with coriander mint chutney.

Let me know if you liked this recipe and any variations I can try the next time.

Until next time, happy cooking!

Mumbai Diaries – Dhokla

I came back to Dubai earlier this week after a 20 day long vacation in Mumbai. It was good fun meeting family and enjoying delicious meals from my mum’s kitchen. How I miss it!

I will start chronicling now on my travel diaries in the blog as well and this is the first of the many to come, let me know your thoughts on the same. The series will have my experiences while travelling to a destination and not necessarily a recipe to go with it. Again I am no expert at writing about travel but being a professional travel writer’s wife, I have come to love travelling even more over the years now.

Going back to my trip to Mumbai, it was such a fulfilling experience when I cooked for my family one evening. I made some pasta, oats spinach tikkis and dhokla.

Dhokla is popular Gujrati snack and quite nutritious at it too. Weight watchers can rejoice since this recipe goes easy on the calories too.

The dhokla turned out much better than usual, must have been my grandma watching over me and giving her expert tips when she saw me mixing the batter or tempering the dhoklas later.

I could see a glint of pride and her smiling ear to ear when I made the tempering and not get deterred by the crackling and popping of mustard seeds. This stuff used to always scare me and I had burnt my wrists a few times panicking over the popping mustard seeds in hot oil.

How things change! We just looked at each other and that moment melted my heart, it was simply beautiful.

Dhokla

Ingredients
Dhokla batter

2 cups gram flour
3 tsp canola oil
2 tsp green chilli paste
1 tsp ginger paste
1 sachet eno (fruit salt)
3/4 tsp lemon juice
Salt to taste
1 1/2 cup water
Handful of freshly chopped coriander powder
Pinch of red chilly powder (optional)
Freshly grated coconut (optional)

Tempering
3 tsp canola oil
2 tsp mustard seeds
2 tsp cumin seeds
10-12 curry leaves (optional)

In a mixing bowl, sieve the gramflour and add salt, eno, chilli, ginger paste and mix well.

Add water, little at a time and blend all the ingredients together. The consistency of the batter needs to slightly thick and hence add water as per requirement. Do not pour all of the water instantly.

Add oil and mix well, this helps give the batter a good sheen. Do not let the batter sit on the side for long after it has been made.

In a steamer, boil water and add the batter to greased plates in the dhokla stands. Fill the plates with the batter only to half the capacity since once steamed, the batter will rise.

Steam for almost 10-15 minutes with the lid on. Always set the steamer on medium heat, high flame will dry out the dhoklas and the end result won’t be soft and spongy.

Just like we check cakes, use a toothpick to check if the dhoklas have been cooked throughout after 10-12 minutes. If the toothpick comes out dry, remove the dhoklas off the heat.

Let it cool for a while and then un-mould them from the plates and cut them in diamond / square shape.

To make the tempering, heat oil and add mustard seeds and cumin seeds. Once they crackle, remove from the heat and with a spoon spread it over the dhokla pieces. I wish I had curry leaves that day so I could have added them to the tempering but we were too lazy to venture out and get some. Aren’t holidays all about lazing around and not stressing over the little things ?

Garnish the dhoklas with a generous sprinkling of freshly chopped coriander leaves, a pinch of red chilly powder and serve with green chutney and tomato ketchup.

I also like garnishing with freshly grated coconut but again it was not available and we gave it a pass.

This is one special post, for me this is not much about the recipe here but about my experience that one rainy evening in Mumbai spending some quality time with my loved ones.

Here’s to my family who taught me cook with love! Happy cooking! 😀

Onion Fritters – Kanda Bhajji

Well here I was trying to continue the Middle Eastern spread on the blog featuring recipes on Tahini and Hummus and then my TL got swamped with tweets and updates on how it’s raining cats and dogs in Mumbai! And I missed the rains terribly!

I completed 3 years being in an expat in Dubai on 28th July! 3 years since I started on this eventful journey to Dubai, living in desert land has being difficult.

Missing the simple pleasures of being in your own country amongst your close circle of family and friends.

Missing important celebrations, where you are a part now only by way of a Skype call, time out with friends, Mumbai monsoons, Frappe at CCD, the lush green gardens in Delhi, the local grocer, chaat and some desi shopping.

But with every such missed opportunity, Dubai has been super kind to me! The city is very welcoming. I find the pace of this city very much like Mumbai. It’s now that I feel like home in Dubai.

Life has been challenging living far away from the comfort of family but here is where me and Sahil set up our home and I’m glad we did. This was one journey which brought us closer than ever!

The thing which I miss the most after my family is Mumbai monsoons! A stroll on beach side, enjoying a cup of masala chai, hearing the pitter patter of the raindrops on the window. When the mist collects on the window panes, writing the special someone’s name with your fingertips on the misty window, listening to cheesy love songs on repeat mode, reading a book and so on!

With these memories came in the thought that if I were in Mumbai, I would have opted to work from home and would have enjoyed hot snacks and endless rounds of chai while lazing away with family!

So being dreamy eyed I thought about my absolutely loved monsoon favorite – Kanda Bhajjis like they say in Mumbai or Onion Bhajiya (fritters). Here’s how I make them at home:

Comes Together in 15 minutes
Ingredients
1 3/4 up besan / gram flour
1 tsp coriander powder
1/2 tsp carrom seeds
3/4 tsp roasted cumin powder
2 green chillies finely chopped
1/4 tsp red chilly powder (add more if you can handle it)
2 tsp hot oil
1/2 tsp chaat masala
Water as required
Handful of coriander leaves finely chopped
Salt to taste
Canola Oil to deep fry

In a mixing bowl, sift the besan and add spices, salt and mix it well with a fork.

Now add little water as per the consistency you like. I thin the batter until the back of the spoon is coated well. The batter should not be too thick else the bhajiyas will be too dough like.

Add the green chillies, coriander leaves and onions well with your finger tips and try to get incorporate some air while mixing them all together, this will help making the bhajiyas light and fluffy.

Add 2 tsp of hot oil from the kadai which will be used for deep frying. These are tips from my grandmother and they really make a difference!

Deep fry spoonfuls of batter in the hot oil and let them cook well on low to medium heat. Don’t be tempted to keep turning the bhajiyas often. Flip them over once they have beautiful golden brown color on each side.

Onion Bhajji

Serve with green chutney, tomato thokku or just with ketchup. Enjoy these!

Until next time happy cooking!

Pav Bhaji

Pav Bhaji

Mumbai monsoons have arrived, said my dad with a chuckle and that we had a long chat reminiscing about how I used to love jumping in puddles of water as a kid when it used to rain! Given the opportunity, I still do 😛

We discussed how the average Mumbaikar’s idea of a good monsoon outing is visiting Juhu beach, eating gola, also known as chuski or shaved ice on a stick submerged in flavored food colored water and downing plates of bhel puri, dahi batata puri and of course the iconic Juhu beach Pav Bhaji.

We got nostalgic about our picnics there when I was a kid, the scary fall I had when horse riding or making sand castles. They were good fun times!

If you visit Mumbai, it is an important to-do in travel iternarary. Over the years the place has been very crowded and now it’s been many years I have not visited Juhu beach. I prefer Worli Seaface instead for the quiet there and listening to the waves!

Below is my take on the Pav Bhaji!

Prep Time : 15 minutes
Cooking Time : 30 minutes
Serves : 4

Ingredients
6 medium potatoes boiled and mashed
1/2 cup green peas
1 1/2 cup caulifower florets
2 green chillies finely chopped (optional)
5 tsp canola oil
2 medium onions finely chopped
1 tsp grated ginger
3 cloves garlic finely grated
6 tomatoes finely chopped
50 ml tomato paste
1 large capsicum finely chopped
2 1/2 tsp pav bhaji masala powder
1 tsp coriander powder
1/2 tsp red chilly powder
1/4 tsp turmeric powder
Salt to taste
5-6 tsp butter
Coriander leaves for garnish
A few wedges of lemon

In a pressure cooker, boil the potatoes in salted water. Once cooled, mash them with a potato masher or with a fork. Set it aside.

Cauliflower - Peas Mash

In a pot, blanch caulifower florets and peas and give them a cold bath once out.

Cauliflower - Peas Mash 1

In a food processor, just blend them together to bread crumb consistency. Do not add any water to the blender. Set it aside.

Pav Bhaji - Prep

The key to making great pay bhaji is being sorted with the prep beforehand. The dish comes together quickly this way.

Let get started!

Traditionally, bhaji is cooked on a flat disc shaped iron tawa (griddle) but I had to do with a humble kadhai in my rental kitchen.

Pav Bhaji2

In a kadhai, heat some oil and add green chillies. Once it sizzles, add the ginger and garlic followed by the onions and cook them until they are translucent.

Pav Bhaji 3

Please note traditionally not many people use green chillies in the pav bhaji and use red chill paste instead. I did not have red chillies on hand and hence went for green chillies.

Pav Bhaji5

To the onions, add tomatoes and cook for a few minutes. Once mushy, add tomato paste, it lends a good consistency to the mix and also gives a deep red color. Cook them well.

Pav Bhaji6

Add chopped capsicum, sautee for a while and add the cauliflower and peas to the mixture.

Add pav bhaji masala, coriander powder, red chilly powder, turmeric and salt to taste. Blend the ingredients well with some water.

Add mashed potato to the mixture and mix well. Keep adding water to the mixture as required.

Add dollops of butter and season well with salt, let it simmer for a while. Usually I use Lurpark or Ellie & Vier butter but for pav bhaji I bring out Amul butter.

Amul butter is just synonymous with Juhu beach style pav bhaji and is like a staple ingredient in every kitchen when making pav bhaji or maybe just me!

Garnish with freshly chopped coriander leaves and some more butter.

Prepare this dish when you feel like indulging and need not worry about the pav maska maar ke! (Indian bread with extra butter)

To have the pav with the bhaji, on a tawa just add butter and roast the pav in the buttery goodness for a few minutes until they have evenly browned.

Pav

You can buy good pav at the bakery section of Lulu or even try the portuguese rolls available at Waitrose.

Serve with dollops of butter on the side, lemon wedges and finely chopped onion.

Pav Bhaji1

I hope you relish this as much as I did. Until next time, happy cooking! 🙂

Vegetable Daliya / Bulgur Porridge

Breakfast 1

I am always on the look out for healthy recipes which are quick to make and are comforting as well. Past few weeks have not been great health wise and thus comes the focus on nutritious food packed with goodness of essential nutrients.

I love having couscous in my salads but this time around I was running out of it hence decided to go for a porridge like dish made of bulgur or broken wheat. I was bored with oats so did not opt for it.

It is a diabetic friendly dish which is high on fibre and protein. Easy to make and something which you can lay on the table in 20 minutes.

Daliya 1

Cooking Time : 20 minutes
Serves : 4

Ingredients
1 1/4 cup daliya / broken wheat / bulgur
1 finely chopped onion
1 finely chopped tomato
1 finely chopped capsicum
1/4 cup shredded carrot (optional)
1/4 cup peas
2 finely chopped green chillies
2 tsp canola oil
1/2 tsp carrom seeds
1 1/2 tsp coriander powder
1 tsp cumin seeds
3 cups water
Salt to taste

In a pressure cooker, heat some oil and add cumin seeds followed by carom seeds.

Once they sizzle, add some green chillies followed by onions.

Cook them until translucent, add tomatoes and cook them for a minute.

Add capsicum, peas and sautee them well. You could also add broccoli, sweet corn to the mixture.

Add all the dry spices and mix well and season it with salt as required.

Vegetables

Add bulgur to this mixture and roast it well until the spices are coated well with it.

Daliya

Add 3 cup warm water to the mixture, mix well and close the lid of the pressure cooker.

Pressure cook until 3 whistles and turn off the heat.

Breakfast

I served this with mango milkshake on a weekend taking in the views from my balcony. Until next time happy cooking!

Cottage Cheese & Spinach Falafel Bites

Throwing in a get together can be exhausting especially when you are clocking in a 10 hour work days and have a crowd to feed and every one has a very specific palette. A little planning goes a long way and making a to-do list for all the prep can ease off any anxiety.

I threw a Holi dinner party for my newly wed brother-in-law and the extended family. Now this is a traditional Punjabi family set up and while we might be Indo-Chinese style Spring Roll, Momos and Pav Bhaji loving folks, on festivals we like to belong where our roots are and so I braced myself to make an out and out Punjabi feast. I took some liberty to tweak only the starters and appetizers.

We thought of bringing in some variety and playing with flavors which are not quite alien to them. My mum-in-law said why not marry a version of palak paneer (spinach & cottage cheese) and chana masala (chickpeas) for them. I remembered this recipe for Spinach & Feta Falafel Balls from BBC Good Food website and adapted the same to my family’s liking.

The result was great! Two recipes which I would keep handy for future get togethers will be this one and my Spicy Peanut Balls recipe served with Tomato Thokku. The textures and flavor combinations are great.

Platter

Serves : 6
Makes about : 30-35 bite sized balls
Prep Time : 10 minutes
Cooking Time : 10 Minutes

Ingredients
200 grams baby spinach
1 can chickpeas
1 medium sized onion finely chopped
50 grams Cottage Cheese
2 tsp roasted cumin powder
1 green chilly
1 tsp coriander powder
4 tsp plain flour
4 tsp herbed breadcrumbs
2 tsp chaat masala
Handful of fresh coriander leaves
Salt to taste

The original recipe called for blanching the spinach by poring boiling water over it. I just sautéed the spinach with onions just until it was soft.

In a food processor, add the onion spinach mixture along with the chickpeas. Rinse and pat dry the chickpeas to avoid more moisture in the mix.

Add cottage cheese, coriander leaves, roasted cumin powder, coriander powder, chat masala, green chilly and salt to taste and pulse well.

Once the mixture is grainy, add flour and breadcrumbs and blend well.

Remove from the food processor, grease your hands and make roll bite sized balls.

IMG_5756

Deep fry over medium heat until they have a pretty brown color. I really wish that I had some pictures for this post.

Cottage Cheese & Spinach Falafel

Serve with tzatziki and hummus.

Besan Ka Chilla – Savoury Gram Flour Pancakes / Crepe

This is a recipe for Besan ka Chilla, simply put Indian savory pancakes made with chickpea / garbanzo bean / gram flour. This is a very easy to make recipe and is perfect for winter mornings or evenings. Goes perfectly with a cup of hot masala chai.

Assembling the ingredients is also very easy. This is my go-to weekend breakfast recipe and is quite filling as well. Chickpeas are an excellent source of proteins and this is an easy gluten free option as well. You can add any vegetables to this versatile crepe / pancake recipe. Sometimes I like to add capsicum or shredded carrots to the mix.

Serves : 3
Prep Time : 5 minutes
Cooking time : 15 minutes

Ingredients
1 cup besan / gram four
3 tsp finely chopped coriander leaves
1 finely chopped green chilly
1 medium sized finely chopped onion
1 medium sized finely chopped tomato
1/2 cup coarsely chopped spinach leaves
1/2 tsp zataar powder
1 tsp carrom seeds
1/4 tsp red chilly powder
1/2 tsp cumin powder
1/2 tsp coriander powder
1/2 tsp chaat masala
A pinch of turmeric powder
Oil for frying
Salt to taste
Water to the consistency desired

In a mixing bowl, sieve the besan and add all the dry spices and salt. Mix well with a spoon.

Add chopped onions, tomatoes, spinach, coriander and chillies to this mixture.

Add little water and mix. Keep adding until it reaches desired consistency.

Some people like the batter to be thick while some like it runny. I prefer reaching a mid point. Here’s how my batter looks like.

Batter

Now on a greased hot pan over low heat, drop a ladle full of the batter and let it take shape. Let the mixture cook.

Besan Ka Chilla

Add any regular oil to the sides and gently flip it over. Here’s where practice comes to the rescue.

Besan Ka Chilla1

Let both the sides get evenly cooked. You are looking for a lovely brown look. I wish I had better pictures for this post.

Besan Ka Chilla2

Serve with tomato chutney or any dip that takes your fancy. I prefer it with toasted bread and butter.

Side Notes:
Adding carom seeds aids digestion.
Zataar powder can be skipped if you do not like it.

Bombay Bites Restaurant Review

It’s been a long gap after which I have started posting my old blog posts pending in my ever increasing drafts folder. Work has been crazy off late, leaving me with no time. However I have been cooking to my heart’s content in the last few weeks given the dinner parties I have been hosting for friends and family. Here’s a post I wrote when I was craving Mumbai street food. Read on to know how I found some yummy street food.

I miss Bombay, also known as Mumbai, my home city and there are days when all I want is, to pack my bags and sit at Worli Seaface especially this time around the year. Anyone who is from Bombay will tell you this that Bombay rains are to die for. The scenic lush green cover that the city adorns itself in, the waves splashing against the shores, the odd teen selling cutting chai and chocolates to the lovey-dovey couples holding hands at the sea side, kids jumping in puddles of water on busy roads while returning back from school, the mums reprimanding them. The city has a character and the rains lend it one.

The rainy season is almost over now but it was pouring cats and dogs in Bombay for the last week for so and talking to my folks back home, hearing them taking it easy and enjoying afternoon siestas followed by masala chai with onion bhajjis, I started missing home and the rainy season even more.

I was craving Pav Bhaji and thus began my quest to look for the same. I turned to Twitter to ask for suggestions. Many options were floating like Sukh Sagar, Kailash Parbhat, Aamchi Mumbai, Mumbai Express.  I have had Pav Bhaji at Sukh Sagar and Aamchi Mumbai and it was kinda average.

I eventually went to Bombay Bites, it is based in Bank Street in Bur Dubai. The owner is from Mumbai and prides himself in his Maharashtrian roots. It started as a cafe where only snacks were served, I first had a Misal Pav and Vada Pav over there last year and never went back since it is a long drive from my place in JLT.

This time around we realized that they have taken over a bigger place and opened a full fledged restaurant next door.

Bombay Bites

We tried their Pav Bhaji and it was yummy. It sure left me satisfied, if you after a fancy presentation and a fine dining experience this is definitely not the place to be. But it has got good flavorsome food.

When I first paid them a visit, it was the mango season. The owners had specially bought Alphonso Mangoes which are the speciality of Ratnagiri region in Maharashtra. The texture and flavor of this variety of mango is best for milkshakes, ice creams, preserves and smoothies. They had displayed the bounty just at the entrance to the restaurant, it was enough to make me salivate at the thought of ‘Aamras’.

Aamrkhand : Aamras

Aamras is mango pulp flavored with a very faint hint of elaichi (cardamom) powder. I also followed it up with Aamrkhand, it is mango flavored Shrikhand. It is a traditional dessert made from strained yoghurt mixed with sugar and then flavors are added. It is best served chilled with hot pooris (deep fried Indian bread)

The Pav Bhaji came complete with tava (flat pan) roasted pao (Indian dinner rolls). The best thing about the bhaji is it is doused with spices and not subtle at all. It is really spicy and has the “Aaahaa” factor in every morsel. The complimentary finely chopped onions and lemon wedges play havoc on the palette.

Pav Bhaji

We went there again last week, this time around again we had the pao bhaji and followed it up with Kesar (Saffron) Dryfruit Milkshake, it was loaded with the goodness of nuts and a hint of saffron on top. It was quite a heavy option and Sahil did not touch my dessert later and this doesn’t happen ever!

Dryfruit Kesar Milk

I was reminiscing about Juhu Beach hence ordered Kesar Falooda. It is a chilled dessert. Again I was ecstatic with the result, a tall glass made a grand entry with even layers of fine vermicelli, basil seeds, pistachios, almonds, three scoops of vanilla ice cream, jelly, chilled sweetened milk, almonds and topped with rose syrup.

Kesar Falooda

Everything about this was wonderful. It was just perfect to be had after the spicy meal I had just devoured.

I think in a city where you have many eateries promising you Mumbai style street food, this is one of best of the crop. It is priced very affordably. Finding a parking spot can be tricky on weekends, I usually end up here during weekdays.

Chat up with the owners, they are a friendly couple. I spoke to them in Marathi and the conversations which followed had me walk out smiling!

Disclaimer : All featured dishes and meals were paid for my me and this post is not a sponsored one.