Heavenly Godiva Chocolate Cupcakes – 4th Year Blog Anniversary


godiva-chocolate-cupcake

Eggless Godiva Chocolate Cupcake


Hello there!

I checked my blog after a long time today and was greeted with this cheery notification.

4 fabulous years of sharing recipes!

blog-anniversary

TasteCharades turns 4!

Here’s to another year of not so perfect posting regime, making plans, forgetting to schedule, feeling guilty. There have been more days (than I anticipated) this year where I have procrastinated posting drafts on the blog over curling up on the couch with hot chocolate in hand and flipping cookbooks, thrown more dinner parties, cooked new cuisines and worked with new ingredients. The best was I got to travel a lot more than I have since 2013. It made a good change of pace in schedule.

Visiting new places brought me new ingredients, new insights and allowed me to sample new food and explore new cultures. Will share more of my travel diaries in the weeks to come.

To celebrate my blog’s 4th anniversary, I am posting my dear friend Syesha’s divine chocolate cupcake recipe. Her constant encouragement makes her my biggest cheerleader and her warm camaraderie keeps me sane.

I asked her to guest blog this recipe the day she posted this delicious looking cupcake on Instagram. She sweetly sent me the recipe and pictures the very same day despite her busy schedule. She is a great restaurateur and a hospitality consultant to reckon with in Mumbai.

So all these weeks later, it seems like a perfect day to celebrate my blog anniversary with her amazing recipe. An ode of our friendship!

Read on and bake this delectable treat for your loved ones over the weekend.

Recipe and picture credits@SyeshaK (Lots of love)


Prep Time: 15 mins

Baking Time: 18 mins
Makes 8 cupcakes

Ingredients:
1 cup unsalted butter softened at room temperature
1/2 cup sugar
1 1/2 cup all-purpose flour or almond flour or oat flour
3 tablespoon plain yogurt in half a cup of water/ Plain Buttermilk
1 tsp baking soda
1 tsp baking powder 1 tsp
1 1/2 tsp vanilla essence
30 gm Godiva chocolate (85% cocoa)
1 Tbsp unsweetened cocoa powder
A pinch of salt

Method:

Pre-heat oven to 180 degrees Celcius for 15 minutes.

In a large mixing bowl, add butter and sugar. You can use brown sugar or sugar-free instead, however, measurements will change in that case.

If using brown sugar, you will need 3/4th cup and if you using sugar-free, it will be 1/3 cup.

Cream the sugar and the butter and slowly add the buttermilk. Beat the mixture until well combined.

In a separate bowl, sieve the flour, cocoa powder, salt, baking soda and baking powder together. Keep aside.

Melt Godiva chocolate using a double boiler.

Combine the flour mixture to the wet mixture,  add in the vanilla essence and melted Godiva chocolate.

Lightly grease the cupcake moulds with butter and add the batter.

Bake for 18 minutes at 180 degrees Celcius.

Allow cupcakes to cool for 15 mins and remove them carefully from bake ware.

Unmould and serve warm with a steaming up of coffee!

godiva-chocolate-cupcake-1

Until next time happy baking!

Dates & Oats Energy Bites

No Bake Date and Oats Energy Bites

Energy Bites

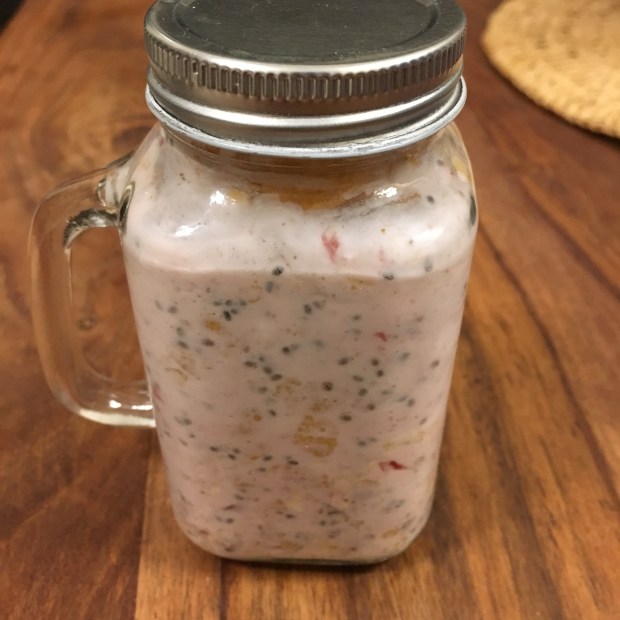
My best friend sent me a picture of my co-workers getting into a habit of eating healthy breakfast at work a few days back. The picture had them bringing breakfast jars to work.

It all started with me sharing my overnight oats jar, with a dear colleague one morning. It got us talking about how easy it is to put together this breakfast option. Like I say healthy need not be boring!

Overnight Oats2

Overnight Oats 

This is for you Sho and MJ, thanks for waking me up from my blog-slumber and reminding me why I love sharing recipes in the first place. Also Palla, without your persistent nudge I would have not written a word this weekend.

So no promises of being regular out here posting recipes. However I would do my best juggling a hectic full time job and a new gym subscription.

Well, the past few months have been quite exciting. I have tried making many lifestyle changes, few have take shape and few are work in progress. More on that soon!

I have not bought white sugar in the last 4 months, given up white rice, tried some exotic ingredients (mac powder, cacao nibs, chia seeds, wheat germ, matcha powder and so on)

Along with thus I have hopped on the bandwagon and made these date-oat energy bites, best decision ever!

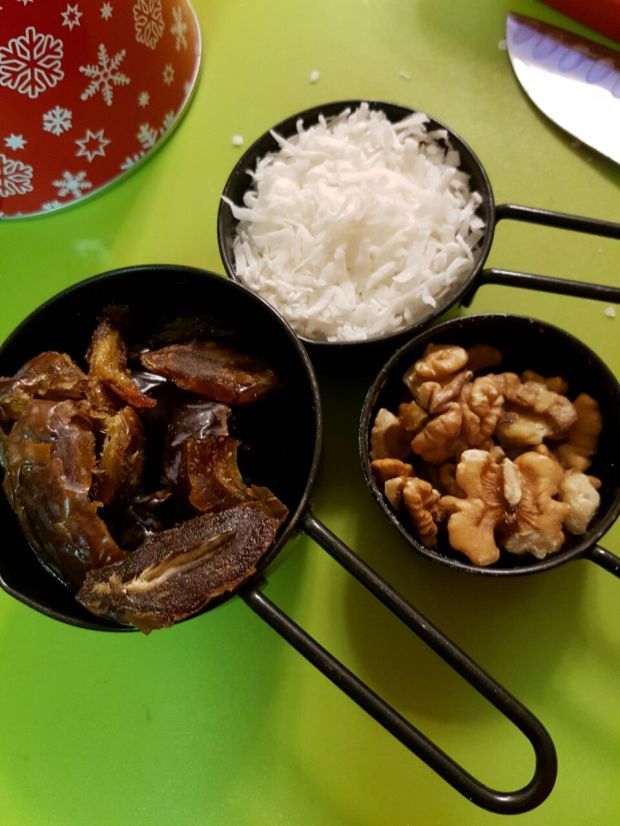
It’s got simple ingredients which come together quickly to get this moorish bite. I made mine with Medjool dates, oats, dried coconut flakes and walnuts, great source of dietary fibre and protein.

I chose Medjool dates on purpose, they are a good source of fibre and essential minerals. I also like their caramel like taste.

Ingredients

Ingredients

Ingredients
1 cup pitted medjool dates
1/2 cup unsweetened coconut flakes
1/2 cup rolled oats
1/3 cup walnuts
1/4 tsp cinnamon or more
Himalayan pink salt to taste
Little water to help blend everything together

Pulse all ingredients together in a food processor for 3-4 minutes. You should have a fine paste.

Remove the mixture in a plate. Grease your palms lightly with any neutral oil or simply dip them in cold water. This would prevent the mixture from not sticking to your hands.

Now take a tablespoon of the date mixture and roll it.

Once you shape it like a small ball, roll only the one side in unsweetened coconut flakes.

Energy Bites

Voila! You got yourself some pretty looking pre or post workout snack to munch on. This recipe should make about 12 bite sized portions.

Store it in an airtight container in the fridge for a week. Pack these in your lunch box, here’s the His&Her edition of lunch boxes in our household. Sahil was very happy to carry these to work!

Lunch Box

What are you usual pre or post workout snacks ? Do let me know!

Dal Fry

Masoor Dal

Missing home and want to comfort your soul ?
Got 20 minutes to put together a meal ?
Feel like eating something light yet nourishing ?

If your answer was yes, make this simple home style dal.

The silky smooth dal is a perfect accompaniment to some jeera rice. Serve with a side of cucumber raita, papad and pickle to make it a complete meal.

Cooking Time : 20 minutes

Ingredients
1/2 cup masoor cup
1 1/2 cups water
2 tsp rice bran oil
1 tsp cumin seeds
1/2 tsp mustard seeds
1 onion finely chopped
1 tomato finely chopped
1/4 tsp red chilly powder
1/4 tsp turmeric powder
1 tsp coriander powder
1/2 tsp cumin powder
1/4 tsp garam masala powder
2 tsp coriander finely chopped for garnish
2 dried red chillies broken
1 tsp butter (optional)
Salt to taste

Wash the dal with several changes of water.

Pressure cook the dal with water and some salt. It should get done in 3 whistles.

Uncover the lid and whisk the dal until smooth. Add a dollop of butter and whisk the dal lightly, this gives the dal a buttery sheen.

In a pan, heat some oil. Once hot, add cumin seeds, mustard seeds and red chillies.

Allow it to sizzle for a while and then add the onions, cook until translucent.

Add tomatoes and all spices, cook for a few minutes and add the dal to the mixture.

Add little water if the consistency is not as you prefer. Allow it to simmer for another minute or so.

You can add kasuri methi to the dal to make it fragrant.

This time around I added chopped coriander instead of kasuri methi. Take it off heat and serve with fluffy basmati rice or rotis.

Until next time, happy cooking!

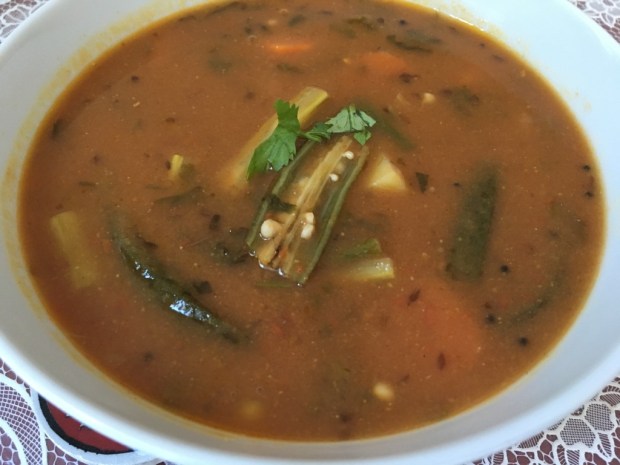
Sindhi Kadhi

SK

This post is an ode to my maternal grand parent’s house and visits to their house during summer holidays. My maamiji makes the best Sindhi Kadhi and I can’t stress how good and firmly the flavours remain etched in my mind till date.

My other favorite recipes from her kitchen are Bharwan Bhindi and Besan Bread.

Maamiji used to spoil all us kids with treats from her kitchen. I remember we all used to assemble at their terrace, fly kites or play some silly games and she used to get us onion bhajjis and bread pakodas with ketchup.

After relishing those hot snacks, we used to queue up at a shop which used to sell coloured popsicles in different flavours. I used to go for Kaala Khatta always.

Ahh! Those were the good old days. Nostalgia is precious!

Off to the post, I have always found Sindhi cuisine very underrated. It needs to be given it’s due. My favourite Sindhi cuisine recipes are Sai Bhaji, Koki Paratha, Lola (you read it right, that’s what it’s called!), Dal Pakwan and Sindhi Kadhi of course.

I have been fortunate to have many Sindhi friends while growing up. Later on our extended family also welcomed my cousin bhabhi’s who were Sindhi. The best part about Sindhi’s is that they really love their food and are happy, good at heart people who value close bond with families and friends. That’s just how Punjabis are!

Alright! Enough of family melodrama from my side, on to the recipe. I am not sure if this is the best recipe for a Sindhi Kadhi however this surely is loved by my family.

Sindhi Kadhi4

Ingredients
4 tsp canola oil
1 tsp cumin seeds
1 tsp mustard seeds
1/2 tsp fenugreek seeds
12-15 curry leaves
1 tsp finely chopped ginger
2 green chillies finely chopped
6 tsp besan (gram flour)
5 fresh tomatoes pureed
1 1/2 tsp coriander powder
1/2 tsp cumin powder
1/2 tsp red chilly powder
3/4 tsp turmeric powder
1/2 cup drumsticks
1/2 cup lady fingers
1/2 cup cluster beans
1 potato diced
1 carrot diced
1 1/2 tsp tamarind paste
Salt to taste
500 ml water

In a frying pan heat some oil, add lady fingers, carrots and cluster beans and sauté them for a few minutes until they are soft.

Take them off heat and set it aside.

In a thick bottomed vessel, heat some oil and add mustard seeds, fenugreek seeds, cumin seeds and curry leaves.


Sindhi Kadhi1Once they splutter, add finely chopped ginger followed by green chillies. Sautee for a bit and add besan. Roast it in oil until it becomes fragrant and gets a new brown hue. This usually takes 5-8 minutes.
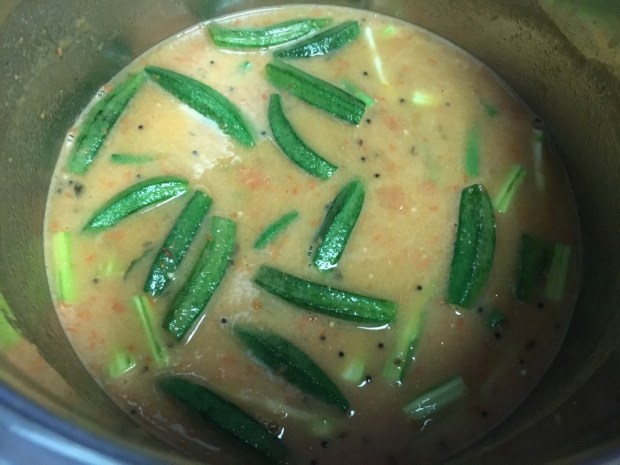
Keep stirring the mixture else the besan can stick to the bottom of the vessel and get burned easily.

Add the drumsticks, potatoes and the sautéed vegetable mixture to the mix.

Sindhi Kadhi3

Add pureed tomatoes and cook them well. You can add all the spices, tamarind paste to the mixture at this point and give it a good stir.

Add water and let this simmer away for 20-25 minutes with a lid on.

Keep stirring the mix at regular intervals. Once it has reached your desired consistency, take it off heat.

Serve with fluffy basmati rice, papad and some aloo bhajjis.

Sindhi Kadhi

Until next time, happy cooking!

Brown Rice Salad

Brown Rice Salad 1

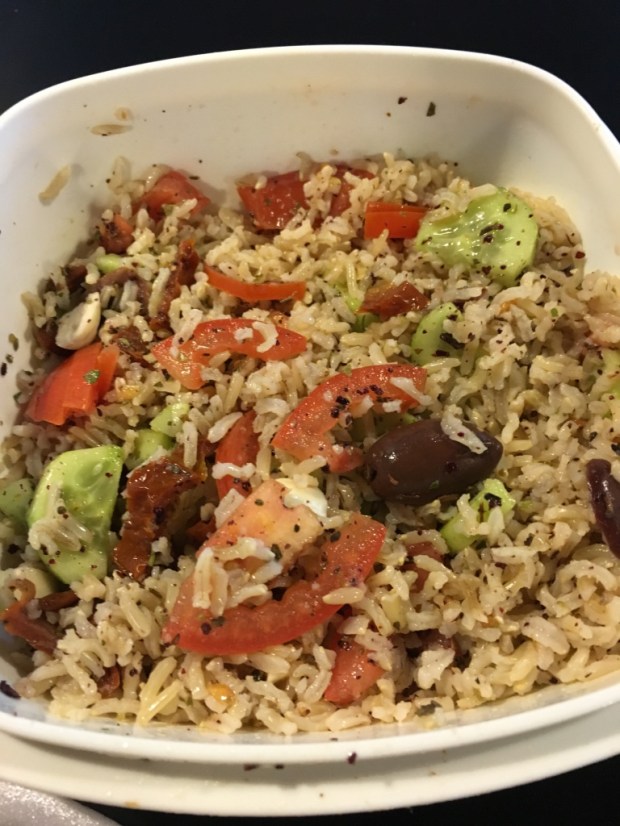
I am always on the look out to use up leftovers, they serve as healthy office lunches options for the next day.

I am trying to slowly move away from the lure of white rice and incorporate more of brown rice and other grains. The new year saw me stocking up on pearl barley, buck wheat, farro and chia seeds. These happen to be ingredients I have always had at eateries, they have not been a part of my pantry.

So here’s to being hopeful that I use them up this year. Sharing the recipe for a simple salad made with leftover brown rice.

Takes 5 minutes to assemble

Ingredients
2 cups cooked brown rice
2 tomatoes thinly sliced
1 cucumber thinly sliced in halfs
1/4 cup kalamata olives coarsely chopped
1/4 cup sundried tomatoes coarsely chopped
1 tsp sumac powder
1/2 tsp mixed dried herbs
Juice of 2 lemons
2 tsp extra virgin olive oil
2 tsp finely chopped mint leaves (optional)
4 sundried tomatoes coarsely chopped (optional)
6 pre-soaked almonds coarsely chopped
Salt to taste

In a mixing bowl, add all the vegetables and rice. Toss them together.

Juice 2 lemons, add sumac powder, dried herbs, salt, olive oil and whisk it together.

Pour this vinaigrette over the rice mixture and toss it well. Garnish the almonds and mint over the salad.

Refrigerate for half an hour or more and relish the salad.

Brown Rice Salad

Until next time, keep it healthy and happy cooking!

Paneer Tikka / Shashlik

My first post for 2016 had to be a special one. New Year’s eve for me and Sahil is mostly at home. We either host a family dinner or a house party with close friends. Once it’s closer to 11pm, we step out and drive around to catch a glimpse of the breath taking fireworks which has tourists from world over flock to Dubai.

This year however we were in mood for something outdoorsy. Josh, my colleague suggested we join him and my other work mates for a camping trip. On a side note, Josh is also a founding member and lead vocalist / guitarist for the popular Dubai band Candy Flippers. Go follow them because they are aaaahhhmaazingggg!

We settled for a BBQ themed camping trip in Ras Al Khaimah desert. The build up to the new year’s eve was amazing as well. After endless banter on a common Whatsapp group and 4 trips to the hypermarket we were well stocked.

Desert

It was fun going to the mall looking for camping supplies since this was my first camping experience in the desert. It was magical to say the least!

I was in-charge of catering to the vegetarians in the group. I decided to go for Paneer Shashlik, Veggie burgers with caramelised onions, roast potato pouches and grilled assorted vegetables.

Here I am sharing the recipe for Paneer Shashlik or Paneer Tikka.

Ingredients
2 1/2 tsp tikka masala
1/2 tsp garam masala
1 tsp cumin powder
2 tsp coriander powder
2 tsp chaat masala
1 tsp dried mint
1/4 cup fresh mint / kasuri methi
1/2 tsp red chilly powder
Pinch of turmeric
750 grams paneer / cottage cheese cut in cubes
2 red peppers cut in squares
2 yellow peppers cut in squares
2 capsicum cut in squares
2 medium red onions cut in squares
400 grams greek yoghurt
3 tsp ginger garlic paste
salt to taste
50 ml canola oil
1 tsp kasundi paste
1 tsp carrom seeds
2 tsp chickpea flour / besan
1/2 tsp red chilly powder
Salt to taste

In a mixing bowl, whisk greek yoghurt and add tikka masala, ginger garlic paste, coriander powder, garam masala, cumin powder, turmeric, chaat masala and dried mint and mix well.

Heat oil in a pan and add carrom seeds. Once they splutter, add kasundi paste and red chilly powder. Let it cook for a few seconds and add chickpea flour.

Keep stirring continuously on low heat until the mixture gets some color. Take it off the heat and pour over the yogurt mix.

Blend the mixture lightly and add the paneer, onions and peppers and coat it evenly with the mixture. Refrigerate for at least 2 hours.

Once you are ready to cook, you can start assembling the paneer tikka on a skewer.

If you are using the bamboo ones, make sure you soak them in cold water beforehand so that they do not burn when placed on the hot BBQ.

I decided to go for the stainless steel BBQ skewers given they seemed sturdy and could make more servings of the paneer tikka in one go. Also they last you many BBQ trips, I got mine for AED 8 for a pair of 4 from Carrerfour.

Now let’s get on to the assembly part, you begin by oiling the skewer well. Add one cube of red pepper followed by one cube of yellow pepper, then one cube of capsicum and lastly one cube of onion and one cube of paneer. Follow this for step for the rest of the mixture on hand.

Place it on the hot BBQ, it takes usually 15 minutes for the skewers to get cooked. Keep turning the paneer skewers after every few minutes so that all sides get some color evenly. Once it is evenly browned, remove the paneer and veggies from the skewers and serve with spicy coriander mint chutney.

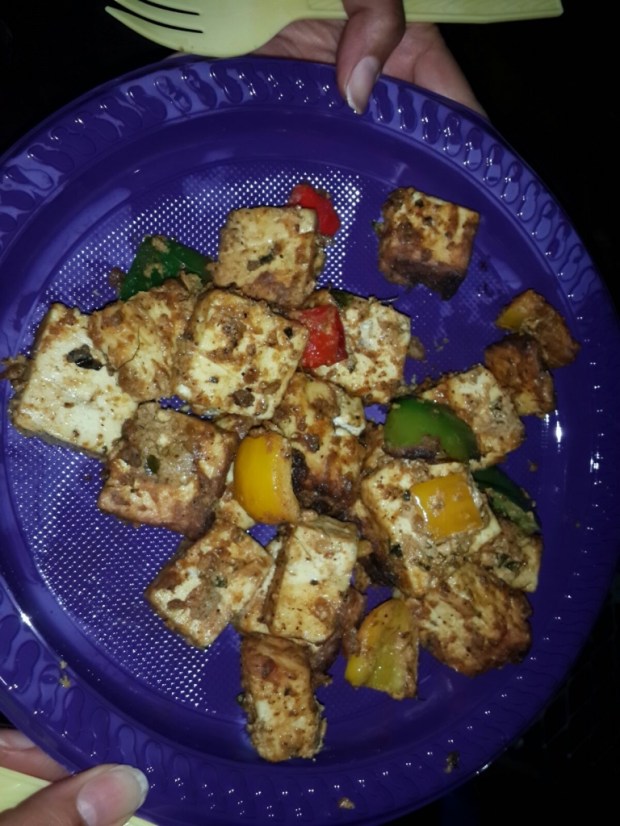
Paneer TikkaUnfortunately I do not have good pictures for the dish however this did taste good and the recipe will be a bookmark for any other BBQ parties I host.
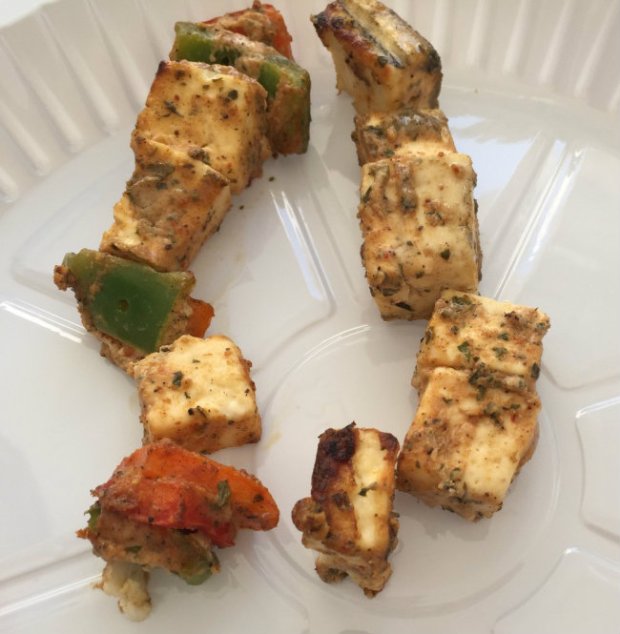
I had used the same recipe before, here is a better picture I have from that BBQ party.

Paneer Tikka 1

However I did make some changes to the recipe and this post includes my revised version.

Do try it sometime and let me know if you like it!

Somewhere in the middle of a desert, cooking on the BBQ, under the stars, next to the bonfire and tents set up, listening to some guitar and have an ensemble croon to melodies. Too much was happening around however I felt a sense of calm and happiness. This is how we welcomed 2016 and hope this be the best year yet for us.

Wishing everyone here as well a great 2016!

Savoury Veggie Oats Upma

I wake up most days thinking what to have for breakfast. It constitutes the most important meal for me personally.

Given that I have a massive sweet tooth, it is tough to stay away from peanut butter jam sandwiches, honey cereal or granola with berry yoghurt and fruits or simple blue berry muffins. However you regret these choices by lunch time since it makes me guilty reaching out for sweet treat after lunch.

I love a hearty breakfast, it just prepares you for the day ahead. Also the first thing I like doing once at work is to pour myself a nice cup of home made masala chai and let out my breakfast box. Ask my work mates and they would vouch for my masala chai getting the most amount of attention even on busy days. It’s cute to have them ask me to share some with them sometimes.

Off late I have been piling on the kilos and am trying to reduce my sugar intake early in the mornings. This led me to look out for savoury options for breakfast, I started with making Indian breakfast essentials Thalipeeth, Poha, Daliya, Besan Chilla and Upma but soon got bored.

Since I had already experimented with oats while making Idlis, I thought giving the humble Upma a uplift with this fab ingredient. And what do I say I am addicted to this recipe!

Oats Upma

It’s easy to prep and make on busy work mornings. I usually don’t go by adding all vegetables as listed below but make use of whatever is in the fridge. Feel free to add or remove the vegetables listed and go by the ones which is easily available for you.

Cooking Time : 15 minutes
Ingredients

2 tsp canola oil
1 tsp cumin
1 green chilly finely chopped
1 white onion finely chopped
1 red bell pepper finely chopped
1 yellow bell pepper finely chopped
2 carrots julienned
1 cup spinach chopped
1/2 cup frozen peas thawed and washed
1 tomato finely chopped
1 1/2 tsp super seed powder
1 cup organic rolled oats
1 1/2 cup water
2 tsp coriander powder
1 tsp cumin powder
1/4 tsp red chilly powder
Salt to taste

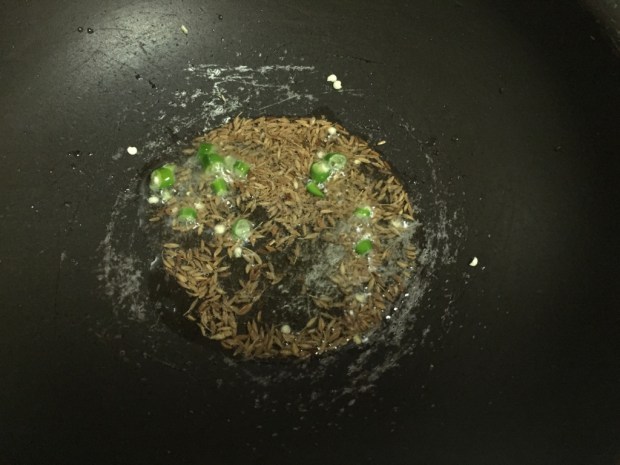
In a wok heat some oil, add cumin seeds and green chilly.

Oats Upma3

Once it sizzles, add onion and cook them until they are translucent.

Oats Upma4

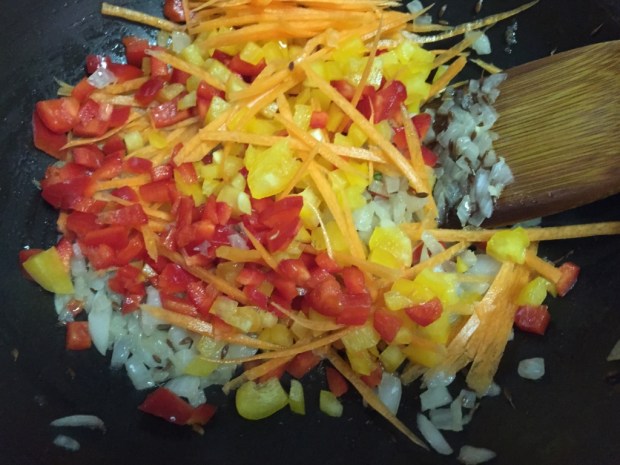
Add peppers, carrots to the mix and cook them for a few minutes.

Oats Upma6

Add spinach, tomatoes and peas to the mix and sauté them lightly. Add salt, super seed mixture and spices.

The super seed mixture I use has a mix of pumpkin seeds, sunflower seeds, flax seeds, chia seeds, wheat germ and some dried goji berries. This is rich in omega 3s, folic acid, fibre and other essential nutrients. I do not like having them on it’s own so disguise their presence. Adding the super seed mix in the upma gives it a good nutty texture.

Oats Upma7

Add rolled oats and mix them well in the mixture. You can roast the oats before adding them.

Once it is blended well with the vegetable mixture, add water and mix well.

Oats Upma8

Cook until all water has absorbed and the oats get a creamy consistency.

Oats Upma1

Serve hot and you are ready to tackle the day ahead. This stays good for 3 days if kept refrigerated in an airtight container.

Oats Upma2 Until next time, happy cooking!

Oats Vegetable Tikki

Oats Tikki

Oats Vegetable Tikki 

I am a huge appetizer fan and usually love to serve a variety whenever I have dinner parties or friends over for chai.

On one such occasion, I served this crunchy on the outside and soft on the inside tikki. Patties, cutlets or tikkis are a staple snack in Northen parts of India. Aloo Tikki is mostly featured in the appetiser section in most Indian eateries and serves as a base for many chaat items.

Move up towards western India and Mumbai has aloo tikki’s popular cousin Ragda Pattice. The spicy chutneys the tikkis are usually served with make it a medley of flavours. Sweet, tangy, spicy and crunchy what more would you need!

These are fairly quick to assemble and make and perfect way to use up leftover boiled potatoes. Since I wanted to feel less guilty, I added some oats and vegetables to them. Adding oats also helped up the crunch factor in the tikkis.

Cooking Time : 10 minutes
Serves : 4

Ingredients
1 cup rolled oats + 1/4 cup ground oats
2 potatoes boiled and mashed
2 tsp coriander powder
1 tsp cumin powder
2 tsp dried mango/ amchur powder
1/4 tsp paprika powder
1 tsp minced ginger
2 green chilled finely chopped
1 red onion finely chopped
2 carrots grated
1 tsp wheat bran
1/4 cup bread crumbs
2 tsp finely chopped coriander leaves
Salt to taste
Canola Oil for shallow frying

Grind the oats. In a bowl, add all the ingredients and mix them well.

Now with greased hands, make 12 equal portions and roll out in flat tikki (cutlet) shape.

Dust them in a plate with equal portions of ground oats and breadcrumbs.

Shallow fry on each side until they acquire a even brown color. Serve immediately with coriander mint chutney.

Let me know if you liked this recipe and any variations I can try the next time.

Until next time, happy cooking!

Zucchini Bake

Hello lovely people!

Long time no see, I hope everyone is gearing up for the cooler months. I envision myself planning tea parties, making homemade soups, sipping on hot chocolate, stocking up on slow cooker, bakes and casserole recipes.

One such Zucchini bake recipe which was an instant hit at a recent potluck at a colleague’s place is what I would like to share with you all.

Zucchini Bake

Zucchini is relatively low in calories making it an ideal item to include when you are watching the scale. It is also high in folate, potassium and Vitamin A.

My earliest memories of eating zucchini are at a Mumbai eatery where I ordered Pasta Arrabiata with mixed vegetables. It had broccoli and some carrots along with some pretty unusual looking green strips. I enquired with the server about what were these green strips which made the overall dish rather pretty and delicious.

And that’s how I was introduced to this beautiful vegetable. I love eating zucchini stir fried with other vegetables on most occasions. However in stir fries I feel like the wonderful flavor of this veggie does not shine through.

Hence I decided to bake this on it’s own with the only exception being some cherry tomatoes and a couple of shallots.

Serves : 4

Ingredients
2 zucchini thinly cut in rounds
12 cherry tomatoes halved
3 cloves of garlic minced
a handful of shallots
Fresh thyme sprigs
Splash of balsamic vinegar
1/2 cup parmesan cheese grated
3 tsp olive oil
Sea salt to taste
White pepper to taste
1 1/2 tsp dried thyme

Line a flat baking sheet with foil and grease it well.

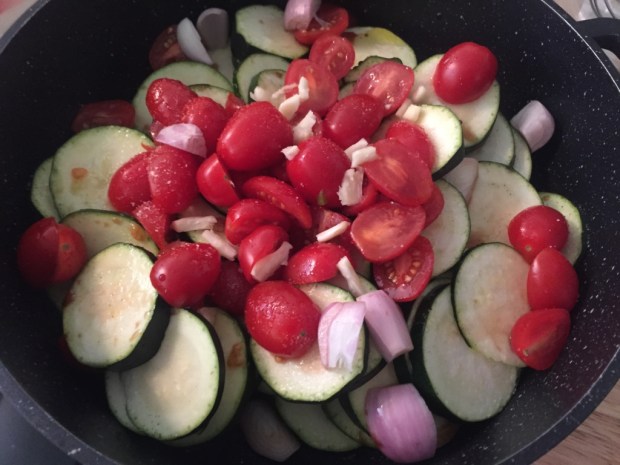
In a mixing bowl, add all ingredients except cheese and coat them well with oil and seasoning.

Zucchini Bake 1

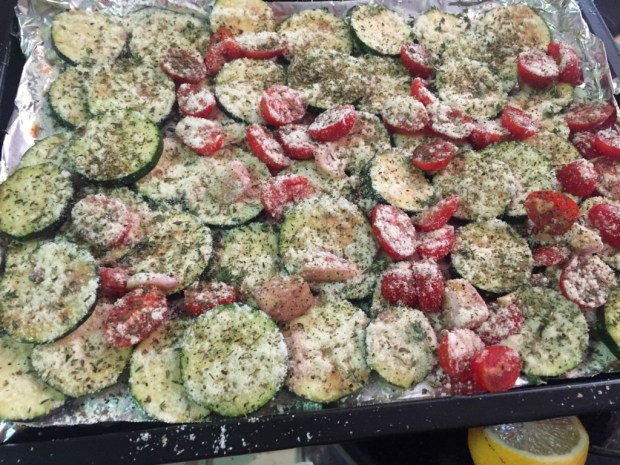
Layer the zucchini neatly on the baking tray and sprinkle parmesan cheese.

Bake for 15 minutes at 170 degrees Celsius. I did not want to over do the cheese and baked it for a short duration so that the flavours of were given it’s due credit.

Serve with any pasta dish or good to be eaten on it’s own.

Until next time, happy cooking!

Shakshouka

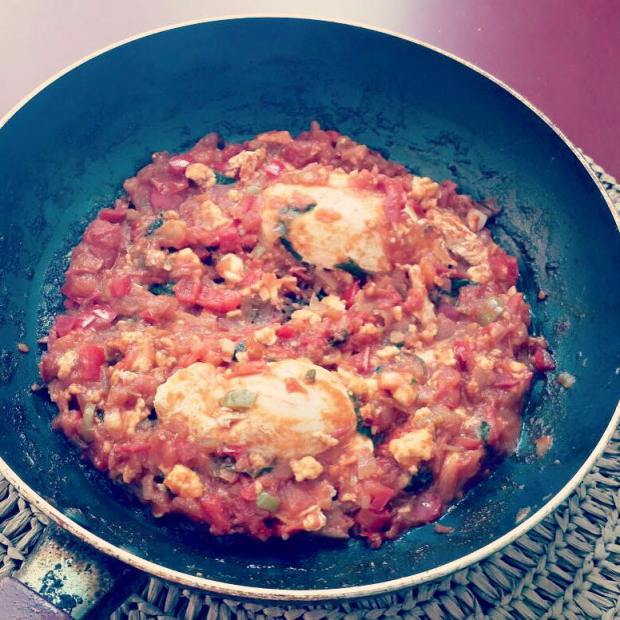
Shakshouka is a savoury North African dish made of poached eggs in tomato based sauce. This happens to be Sahil’s favorite order when we go out for breakfast. Either Shashouka or spinach salman omelette or Fritatta.

So this is my feeble first attempt at making him his favourite breakfast earlier last month. I have just kept the recipe very simple. If you do have any shakshouka recipe please pass it on, I will like to very much give it a try.

Shashouka

Serves : 2

Ingredients
3 tsp olive oil
1 white onion finely chopped
3 tomatoes finely chopped
1 red pepper finely chopped
1 jalapeño pepper finely chopped
3 cloves garlic finely chopped
1 tsp cumin powder
1 tsp red chilly powder
1 tsp chilli-garlic sauce
Handful of feta cheese crumbled (optional)
2 tsp tomato ketchup
2 eggs
Salt to taste
Freshly cracked black pepper to taste
Handful of basil leaves torn

In a pan, heat oil and add onion and cook them until they are translucent. Add garlic and cook it for a minute.

Follow this up with red pepper and jalapeño, cook them until they have softened a bit. To this add tomatoes, red chilli powder and cumin powder and cook until the mixture is cooked well. Add seasoning and the sauces.

Crack open 2 eggs on top of the mixture and cook them with a lid covered over medium heat.

Once the eggs have cooked, take the dish off heat and serve immediately with crusty bread.

Until next time, happy cooking!