Coffee Speculoos Ice cream

A dinner party is a great time to dish up something new and keep the options exciting for the guests.

I usually bake cakes on such occasions. Like Julia Child quotes – “A party without a cake is just a meeting”. However this time around friends called to say they would be bringing in some cake.

I have been waiting to experiment with frozen delights for quite a while now. This summer I want to perfect the art of making granitas, ice creams and sorbets. So this is the very first recipe amongst the more to follow.

I came across this fantastic coffee ice cream recipe on Food52. I just made slight changes to the recipe and here I present my version. I lowered the cinnamon and increased the coffee content plus did add some speculoos!

My guests loved the icecream very much and honestly I did not manage to click any good pictures. We were already halfway through the icecream container when I hurriedly clicked one.

Coffee & Speculoos Icecream

Serves : 8

Ingredients
750ml heavy cream
4 tsp + 2 tsp speculoos chocolate powder to make the swirl pattern
125 ml brewed coffee
1/2 tsp cinnamon
2 cans of condensed milk
1 tsp coffee powder

Pour heavy cream and condensed milk in a bowl and use electric whisk until the mixture is has started to thicken.

Coffee & Speculoos Icecream2

I wanted a really strong flavor of coffee in the icecream hence I used 3 teaspoon of Dark Roast Davidoff coffee and brewed the same. To further intensify the flavors, I added another teaspoon of the coffee powder and it sure did pack a punch!

Add cooled coffee, cinnamon, coffee and speculoos powder to the mix and whisk again until the mixture has blended well together and is super thick in consistency.

Coffee & Speculoos Icecream3

Pour in airtight container and sprinkle some speculoos powder on top. Now with help of three toothpicks held together, get swirling.

Coffee & Speculoos Icecream1

Freeze overnight and don’t be too tempted to eat spoonsful of the ice cream mixture right then!

The swirls looked lovely after the ice cream had freezed. This is a no-churn ice-cream hence does not take much time as well.

Coffee & Speculoos Icecream

Serve with a smile and see your party come alive. It was a very rewarding feeling seeing my friends smile while taking every spoonful! 🙂

Kaju Peda – Cashew Truffles

CP
It’s the eighth day of Chaitra Navratri today. Navratri is a festival of nine nights, “Nav” means nine and “Ratri” means night.
The beginning of spring and the beginning of autumn are considered to be important junctions of climatic and solar influences hence it is observed as an auspicious period of worship for Hindus.
During this period, people fast and do not eat non-vegeterian food and avoid onions and garlic. We ended our fast today with prayers in the morning and made the ‘bhog’ i.e. offerings of poori, Semolina Halwa and Kale Chane.
 
I have featured here a recipe for Kaju peda, it’s a traditional Indian cashew nut fudge recipe. It’s very simple to assemble and easy to make as well. I made this for Diwali last and again on Gudi Padwa.
Gudi Padwa is celebrated on the first day of Navratris and marks the start of a Marati new year.  Gudi Padwa is mainly celebrated in the Indian state of Maharashtra where I was brought up.
Cashew Pedas
 
Makes Approximately: 20 pedas
 
Ingredients
200 grams cashew nuts
2 tsp clarified butter / ghee
1/2 to 3/4 cup powdered sugar
1 tsp cardamom powder
Few tsp of full fat milk
Slivered Pistachios to garnish (optional)
Soak the cashews in warm water for 2-3 hours. Once the cashews are soft, drain them and blend with very little water in a blender.
Pulse the cashews until they are creamy.
Cashew Mixture
In a thick bottom wok on low heat, heat ghee and add the cashew mixture. I usually oil the wok so that the cashew mixture does not stick to the wok.
Add powdered sugar, cardamom powder and full fat milk to this mixture and keep blending it well until the sugar dissolves.
Cooking
After a few minutes, the mixture will start leaving the sides of the wok. Turn off the heat at this point.
Cooling the Mixture
Let the mixture cool until it is ok to handle the mixture. Make bite sized balls from the cashew mixture. Let me show you my attempt previously around Diwali which I was not quite happy with.
Diwali
Result this time, the difference just adding 2-3 tsp of milk to the mixture so that it does not dry out. Also I did grease my palms well and hence you see the sheen on the peda this time around. Win!
Cashew Peda2
Press down a pistachio sliver in the cashew ball and roll it well.
You can also use silver vark easily available in Al Adil stores to add a nice festive touch to the pedas.
I will bring you some Navratri recipes over this week before it’s too late. Happy Cooking! 🙂

Eggless Chocolate Walnut Brownies

Weekends usually mean having family over for lunch or in evening for snacks and some drinks. I have a dear brother-in-law staying here in Dubai for the last 6 years. He helped us settle in when me and husband were newbies around here and is our only close family out here.

He got married a few days back and I’m currently in New Delhi, visiting home for his wedding. He came over to discuss his last minute anxieties and we were happy to share his joy. To celebrate this occasion, I decided to bake some brownies, who doesn’t like a chocolate chip brownie served with a dollop of vanilla ice cream. A late post but as they say it’s better late than never!

I’m posting this today on my Mum-in-law’s birthday.

Brownies3

Ingredients
Serves : 4
Prep Time : 10 minutes
Baking Time : 28-30 minutes

1 cup all-purpose flour
1/4 cup unsweetened cocoa powder
3/4 cup caster sugar
1/3 walnuts chopped coarsely + 2tsp to garnish
1/3 cup of canola oil
1 cup of milk
1 tsp of vinegar
1/2 tsp coffee powder
1/2 tsp vanilla extract
1 tsp baking soda
Handful of chocolate chips to garnish
A pinch of salt

Pre heat the oven at 180 degrees Celcius.

Sieve the flour, baking soda, cocoa powder and salt.

Mix the milk at room temperature with coffee powder and vinegar and set aside

Mix the caster sugar to the dry ingredients.

Mix the oil and vanilla extract to the milk mixture.

Add the flour mixture and the milk mixture together and blend well.

Add chopped walnuts to this and fold the mixture gently.

Pour the batter to a well greased pound cake pan and top it with chopped walnuts and chocolate chips.

Batter

Bake for 25-30 minutes until a skewer inserted in the middle comes out clean.

Brownies 1

Cool the brownies completely before cutting them in neat squares.

Brownies
Serve with a dollop of vanilla ice cream and cut strawberries.

Brownies 2

The brownies will stay well up to 3 days.

2014 – A new year! An old post! Super Moist Chocolate Cake :)

Chocolate Cake1

Happy New Year! I hope everyone has a blessed year with good health, happiness and contentment in life. Late wishes I know, but like they say – Better Late Than Never!

Before I hop on and start creating memories for 2014, I want to share that it was a lovely December last year! Apart from the ever increasing To-Do list, year end review and strategy meetings at work, I have had a blast.

I have been dining out almost thrice every week for a month now, given late evenings at work leave me too exhausted to face the stove top. However I have been batch cooking a lot for friends and family this month. I even sent a care package of granola bars and cookies to mom-in-law ensuring she does not miss her granola at breakfast. She lovingly distributed some to her kitty party friends.

Last 10 days of 2013 have been very endearing filling me with gratitude for God having given me a great year and making me hopeful of an even better 2014.

I participated in @uaesecretsanta this year, it’s a stand alone gift exchange for tweeps within UAE. I got gifted an amazing book on baking and a Gingerbread house making kit from Tavola by my super sweet Santa.

Ain’t it cute! My secret santa was very thoughtful towards my wish list I’d say. See them below, so this post is dedicated to her 🙂

Secret Santa Gifts

I did my bit by sending gifts to my Santee too and it reached her just in time.

This year New Year’s evening was a quiet one for me and Sahil, we are home listening to some music, sipping our favorite beverages, me masala chai and him his Old Monk. He was working on his final draft for his upcoming coffee table book and I was catching up with friends and family back home. We later stepped out and saw the amazing fireworks. We parked ourselves with several others on the Knowledge Village flyover, we had distant view of fireworks at Global Village, JBR and Burj Khalifa. The magic begun when Burj Al Arab started it’s colorful array of fireworks.

And then like Dubai style, the best was saved for the last. What I saw gave me goosebumps! The much awaited fireworks started over the Palm, a 180 degrees view of colors and lights saw me giggling like a school girl. I such a sucker for fireworks! This was the highlight for my New Years Eve and I will cherish this for the longest time ever.

For the first post of 2014, I’m sharing a recipe for a chocolate cake I baked for my office pot luck lunch for Christmas. Yes! I had a full working day but it turned out to be fun towards the end of it.

I have completely followed the recipe from Joy of Baking’s website. This is very simple cake, comes together in just less than an hour including the prep time. Perfect when you are hard pressed for time like I was!

http://www.joyofbaking.com/cakes/SimpleChocolateCake.html

Chocolate Cake Making

It’s quite a thin batter which can get you scared in the beginning whether the cake will hold it’s shape but it’s alright. The end result is a gooey, moist chocolate cake oozing with flavor. This is one recipe I swear by, it’s not let me down ever.

Chocolate Cake

I simply topped it with some home made chocolate fudge frosting and strawberries! My colleagues are a berry loving lot 🙂

Chocolate Fudge Icing 

1/3 cup unsalted butter at room temperature
1 cup icing sugar
1/3 cup milk
1/4 cup unsweetened cocoa powder
1/2 tsp vanilla extract

Combine cocoa powder, sugar and milk in a saucepan and blend all together for few minutes on medium heat. Take off heat when it starts to simmer, add butter and mix well. Add vanilla extract and blend all the ingredients together. You can add little milk if the mixture is too dry. Let the mixture cool down. Spread over cake sparingly, the fudge icing stays well if kept refrigerated unto 3 days.

I hope I’m able to bring out more posts at regular intervals this year around! Here’s too more cooking and creating great foodie memories ahead 🙂

Besan Halwa

Besan Halwa1

It’s the first day of Diwali today and every Indian household is preparing to kickstart the festivities in a gala way. This year it’s our first Diwali outside India, every year we fly down to home to celebrate it with friends and family. However this year around Mum-in-law decided to come and visit us.

It’s really special having her around. She is working with me on spring cleaning the house, having the lights decorated in the small balcony, making sweets and savories, shopping for new clothes and jewellery. It’s like we have a Santa in the house way before Christmas.

Today is a very auspicious day for Hindus, it’s called Dhan Teras. We offer our prayers to Goddess of wealth – Laxmi for success, prosperity and peace. It’s a traditional custom to buy jewellery or utensils for good luck.

Rangoli

Rangoli is made at the entrance of the house welcoming the Goddess. Rangoli is hand made designs using colored powders and flowers. Deeyas (oil lamps) are used to enhance the decoration and also lighted as a traditional way to welcome the festival. Deepawali or Diwali is also known as a festival of lights.

Besan Halwa

I’d be featuring some of the family favaorites in the coming days, starting with Besan Halwa. You can also read about Sooji (Semolina) Halwa and Rava Nariyal Laddoos (Semolina & Coconut Balls) I posted last year.

Prep Time : 5 minutes
Cooking Time : 25 mins
Serves : 6 persons

Ingredients

1 cup besan (chickpea flour)
1 cup sugar
3 cups water
1 tsp eliachi powder
3/4 cup ghee (clarified butter)
1/2 cup mix chopped nuts

In a saucepan, heat water on medium heat and add sugar and crushed cardamoms. Adding the elaichi to the sugar syrup makes it fragrant and allows the sugar to blend in the cardamom flavors.
In a thick bottom kadai (wok), heat ghee and add besan. Please ensure that you keep stirring the besan so that the mixture does not have any lumps.
The color you are looking for is a pale golden and do not let the besan brown or stick to the bottom. While roasting the besan in the ghee, it gives out a very nice aroma. It is usually is good after 5-7 minutes.

Add the coarsely chopped nuts,  I used cashews, almonds and pistachios.

In a different pan, heat some ghee and add the raisins and let them bloom a bit. Add the raisins to the mixture.

Now add the sugar syrup to the mixture. Be careful with this step and ensure that the burner is on low heat since the syrup will start to bubble and will sprinkle all over.

Blend in all of the mixture with the sugar syrup evenly and keep folding the mixture so that it does not stick to the bottom of the saucepan.

After a few minutes, you will see the mixture thicken and almost start leaving the sides. Take it off the heat and transfer it in a bowl and garnish with some more chopped nuts.

Besan Halwa4

On this sweet note, here’s wishing you and your family a Happy Diwali! I hope the festival of lights illuminate your lives with happiness and contentment 🙂

Perfect Your Pasta Cooking Class at Galeries Lafayette

I have always loved Italian cuisine. Sahil, my husband dreams of long getaways in the Tuscan countryside and whenever he speaks about the same I get all dreamy.

One day while casually sipping coffee and going through posts on Facebook, I came across a contest ‘Perfect Your Pasta’ by Good Magazine UAE. My eyes lit up and I quickly decided to try my luck, said a quiet prayer in my heart and participated.

I am a bit of a magazine junkie, having subscriptions to most of the leading magazines crowding my work desk in the first week of every month. I usually retain cut outs of favorite articles and recipes and put them in my folder.

So I was delighted when I won a spot for this cooking class. What made it perfect was that I could bring along a plus one, Sahil volunteered, it was fun cooking with him. We bonded well over pasta flour and who managed to get the consistency right. Poor guy! He struggled but he was ok after a while.

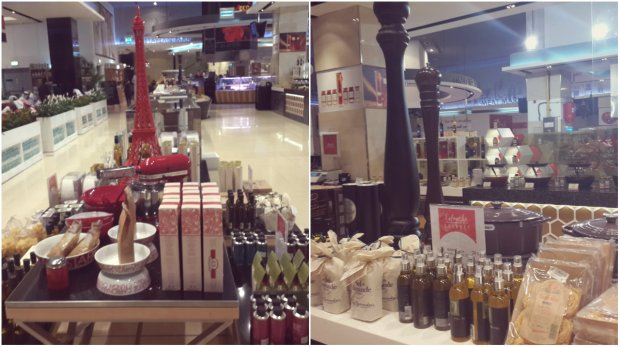
On arriving at the very plush Galeries Lafayette, we were welcomed by the PR team of the store and then were greeted by Chef Russell Imparizi, the Culinary Director for Galeries Lafayette Gourmet.

Galeries Lafayette is a French department store located in Dubai Mall. The store is aesthetically decorated. I have frequented their in-house grocery section on the second floor many times but I have never sampled the food out there.

GL

Chef Russell and his team of talented chefs took us through each and every step very patiently and were all ears to our questions. Chef Russell started by taking us through the ingredients list and introduced us to the flour used for making pasta.

Pasta Flour

I was very excited since this was the first time I got to make the pasta dough on my own and actually used a pasta machine. There were two other participants apart from us. We were divided in teams of two and were allotted different work stations.

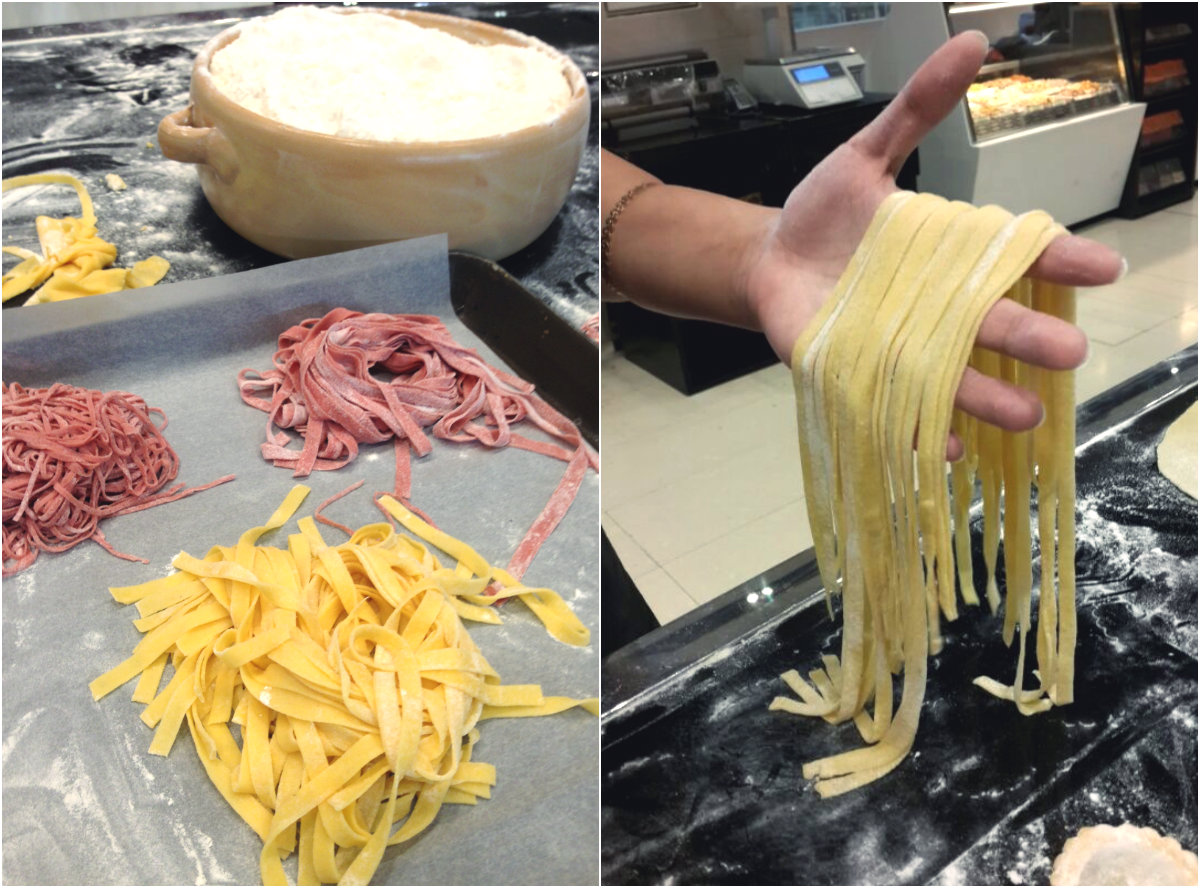
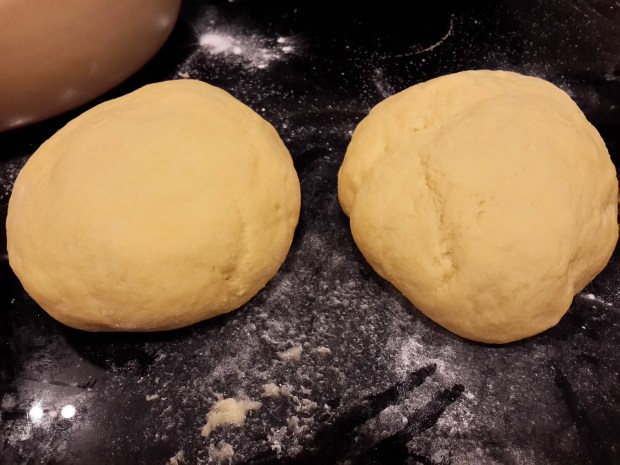
We made basic pasta dough, the one to the left belong to moi. They came out pretty well and it’s amazing how easy and simple it is to make your own pasta.

Basic Pasta Dough.jpg

After that Chef instructed us to choose our individual preferences for making the flavored pasta dough.

Purees

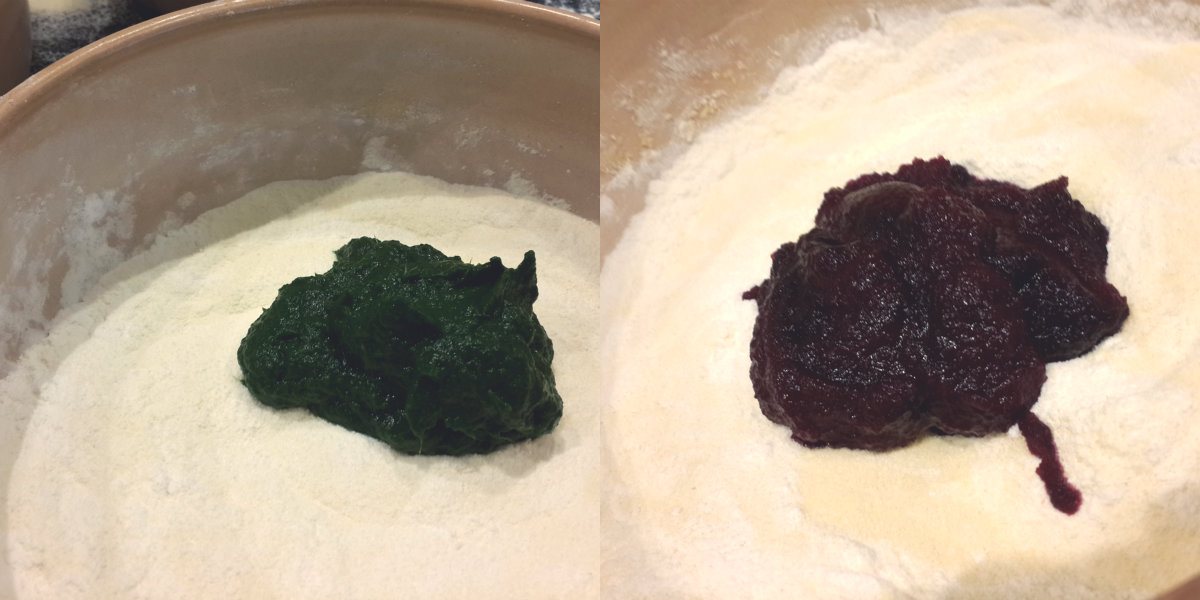
Sahil chose to go for Beetroot while I stuck to my favorite Spinach. Yes! I’m the Popeye of the family.

Other options were chocolate and carrot. The purees were already made for us so it was easy to use a couple of spoonfuls of the puree to our basic pasta flour and then go ‘knead-knead’.

Pasta Filling

You can see all the different pasta doughs stacked against each other.

Flavoured Pasta Dough

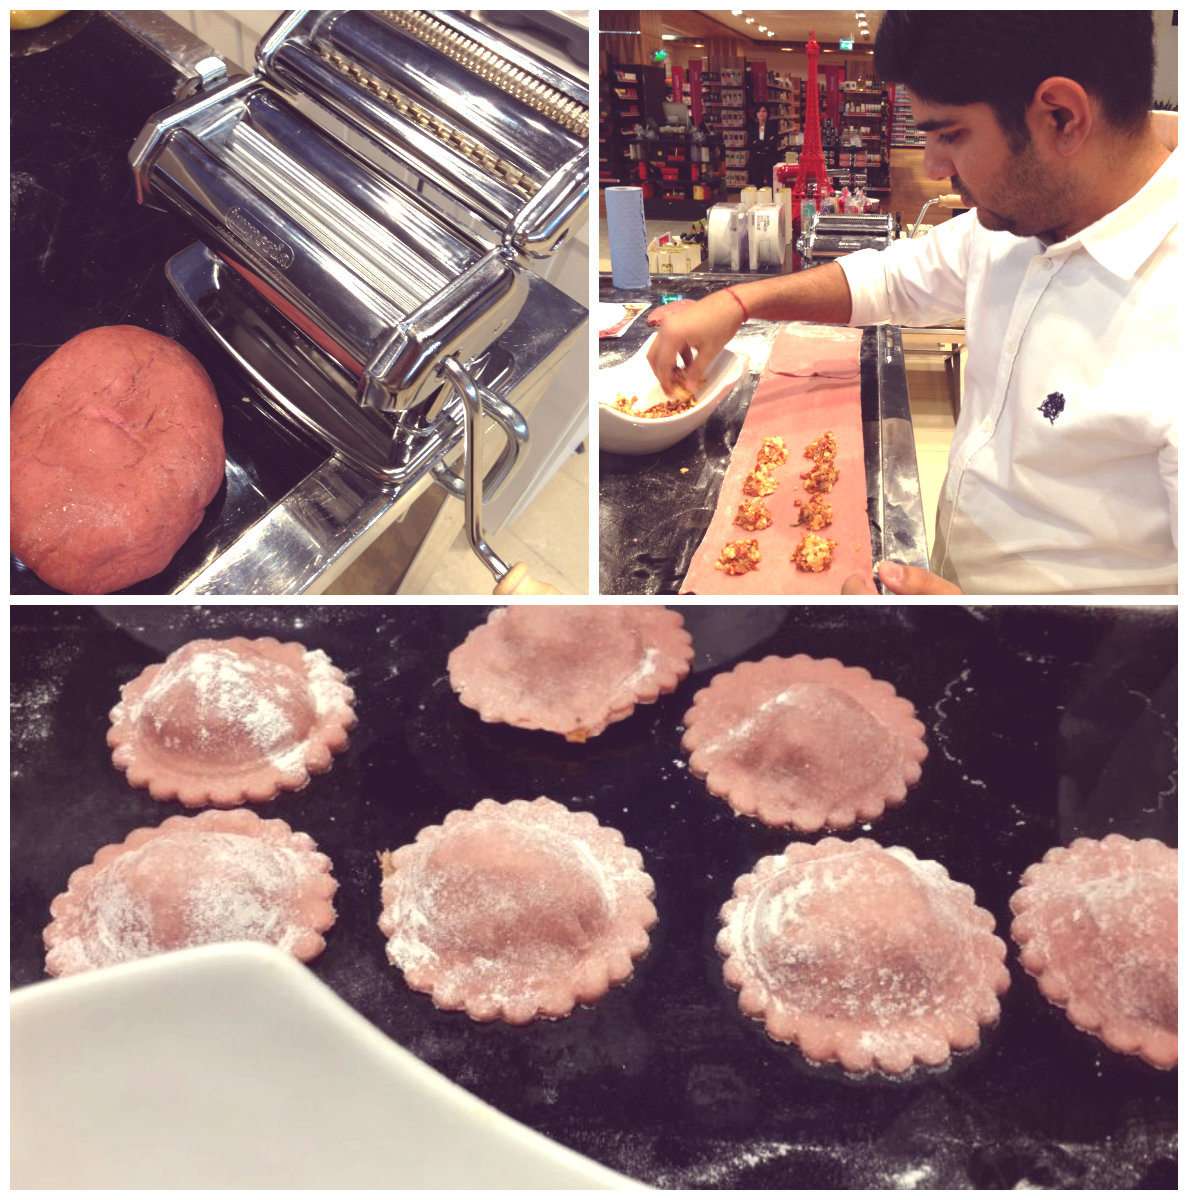
After the dough was made, it was allowed to rest for around half an hour. Thereafter we moved on to working on the pasta machine, it was fun making the pasta in different shapes. We made Ravioli, Tortellini and Tagliatelle pasta.

Tagliatelle

I had fun rolling the pasta sheet, layering the filling and then shaping the Spinach Ravioli. Cynthia from the PR team was great and she ensured she went all ‘click-click’. She very sweetly shared the pictures the very next day.

Spinach Ravioli

The Spinach ravioli had a spinach and ricotta cheese filling whereas the beetroot ravioli had a sun dried tomato and goat’s cheese filling. You can see Sahil in the pictures below concentrating on getting the proportion of the filling to pasta right.

Beetroot Ravioli 2

It took me quite a while to get a hang of making the Tortellini and I have to say I just couldn’t get it right. So here’s the ugly looking Tortellini I made. Chef Russell was kind enough to pep me up and say that at least I managed to get the dough correct.

Tortellini

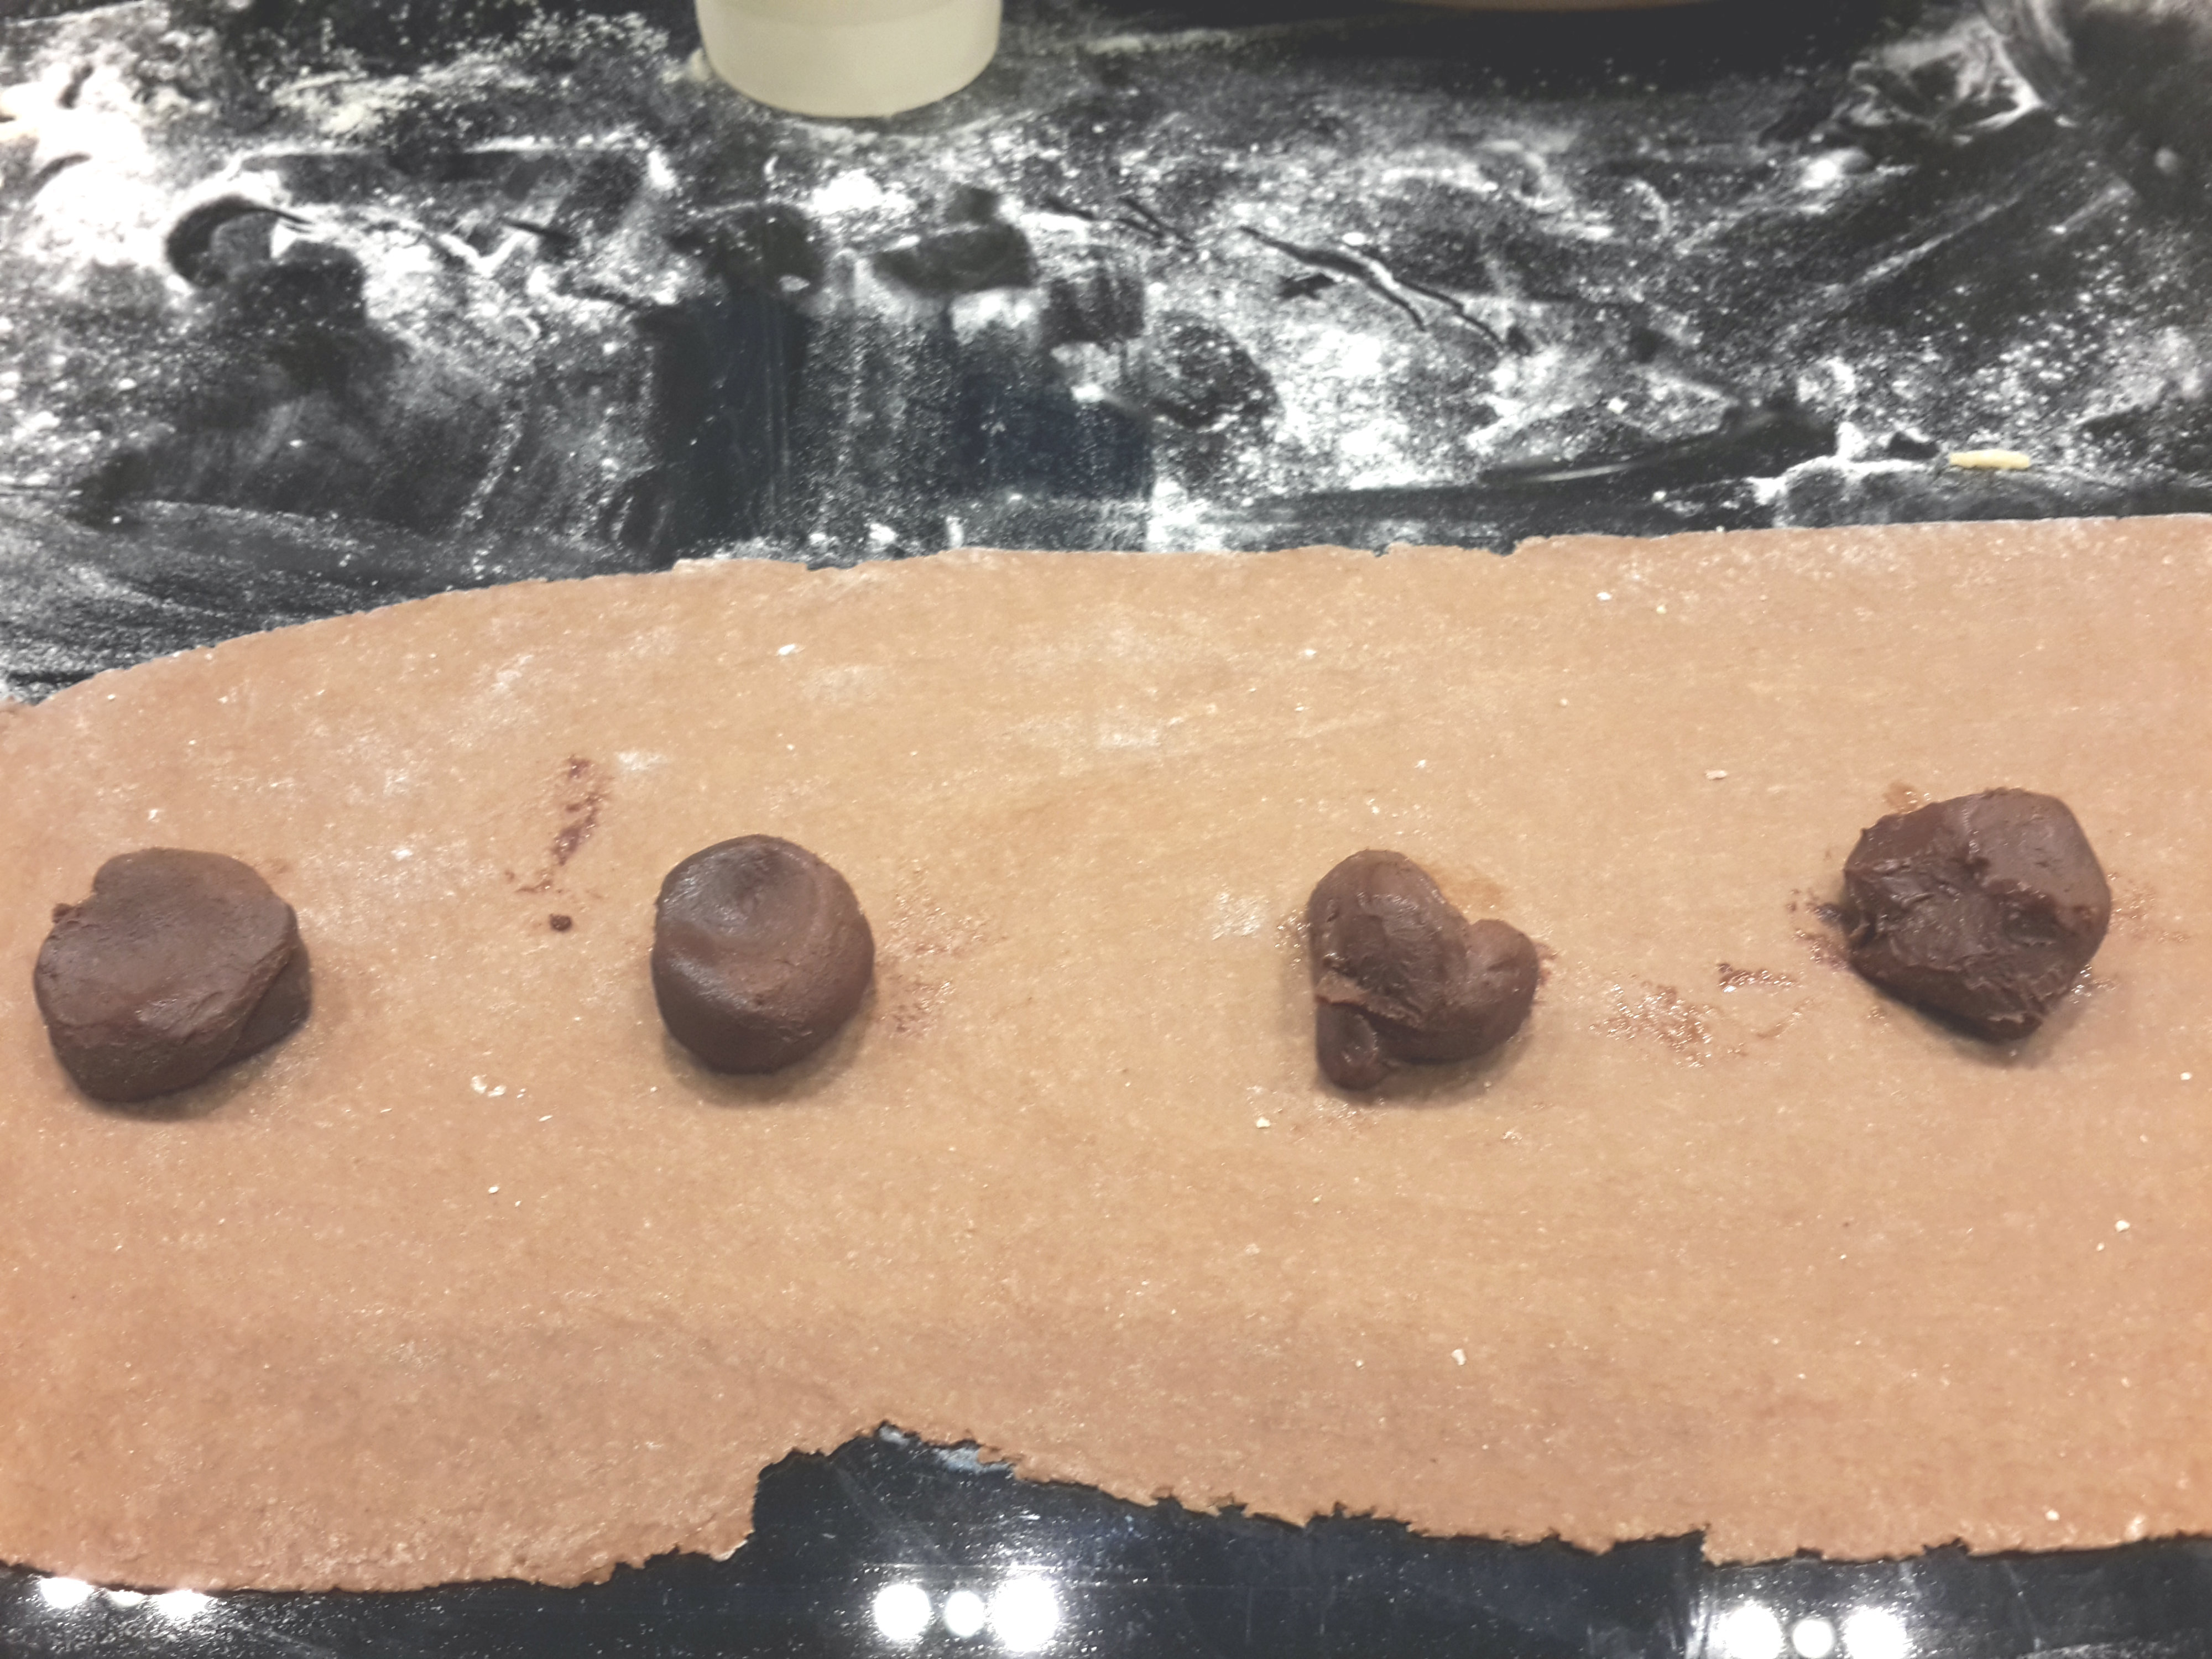
How could we not have dessert! So there comes Chocolate Ravioli *happy dance* We stuffed the ravioli with tiny chocolate ganache logs.

Chocolate Ganache

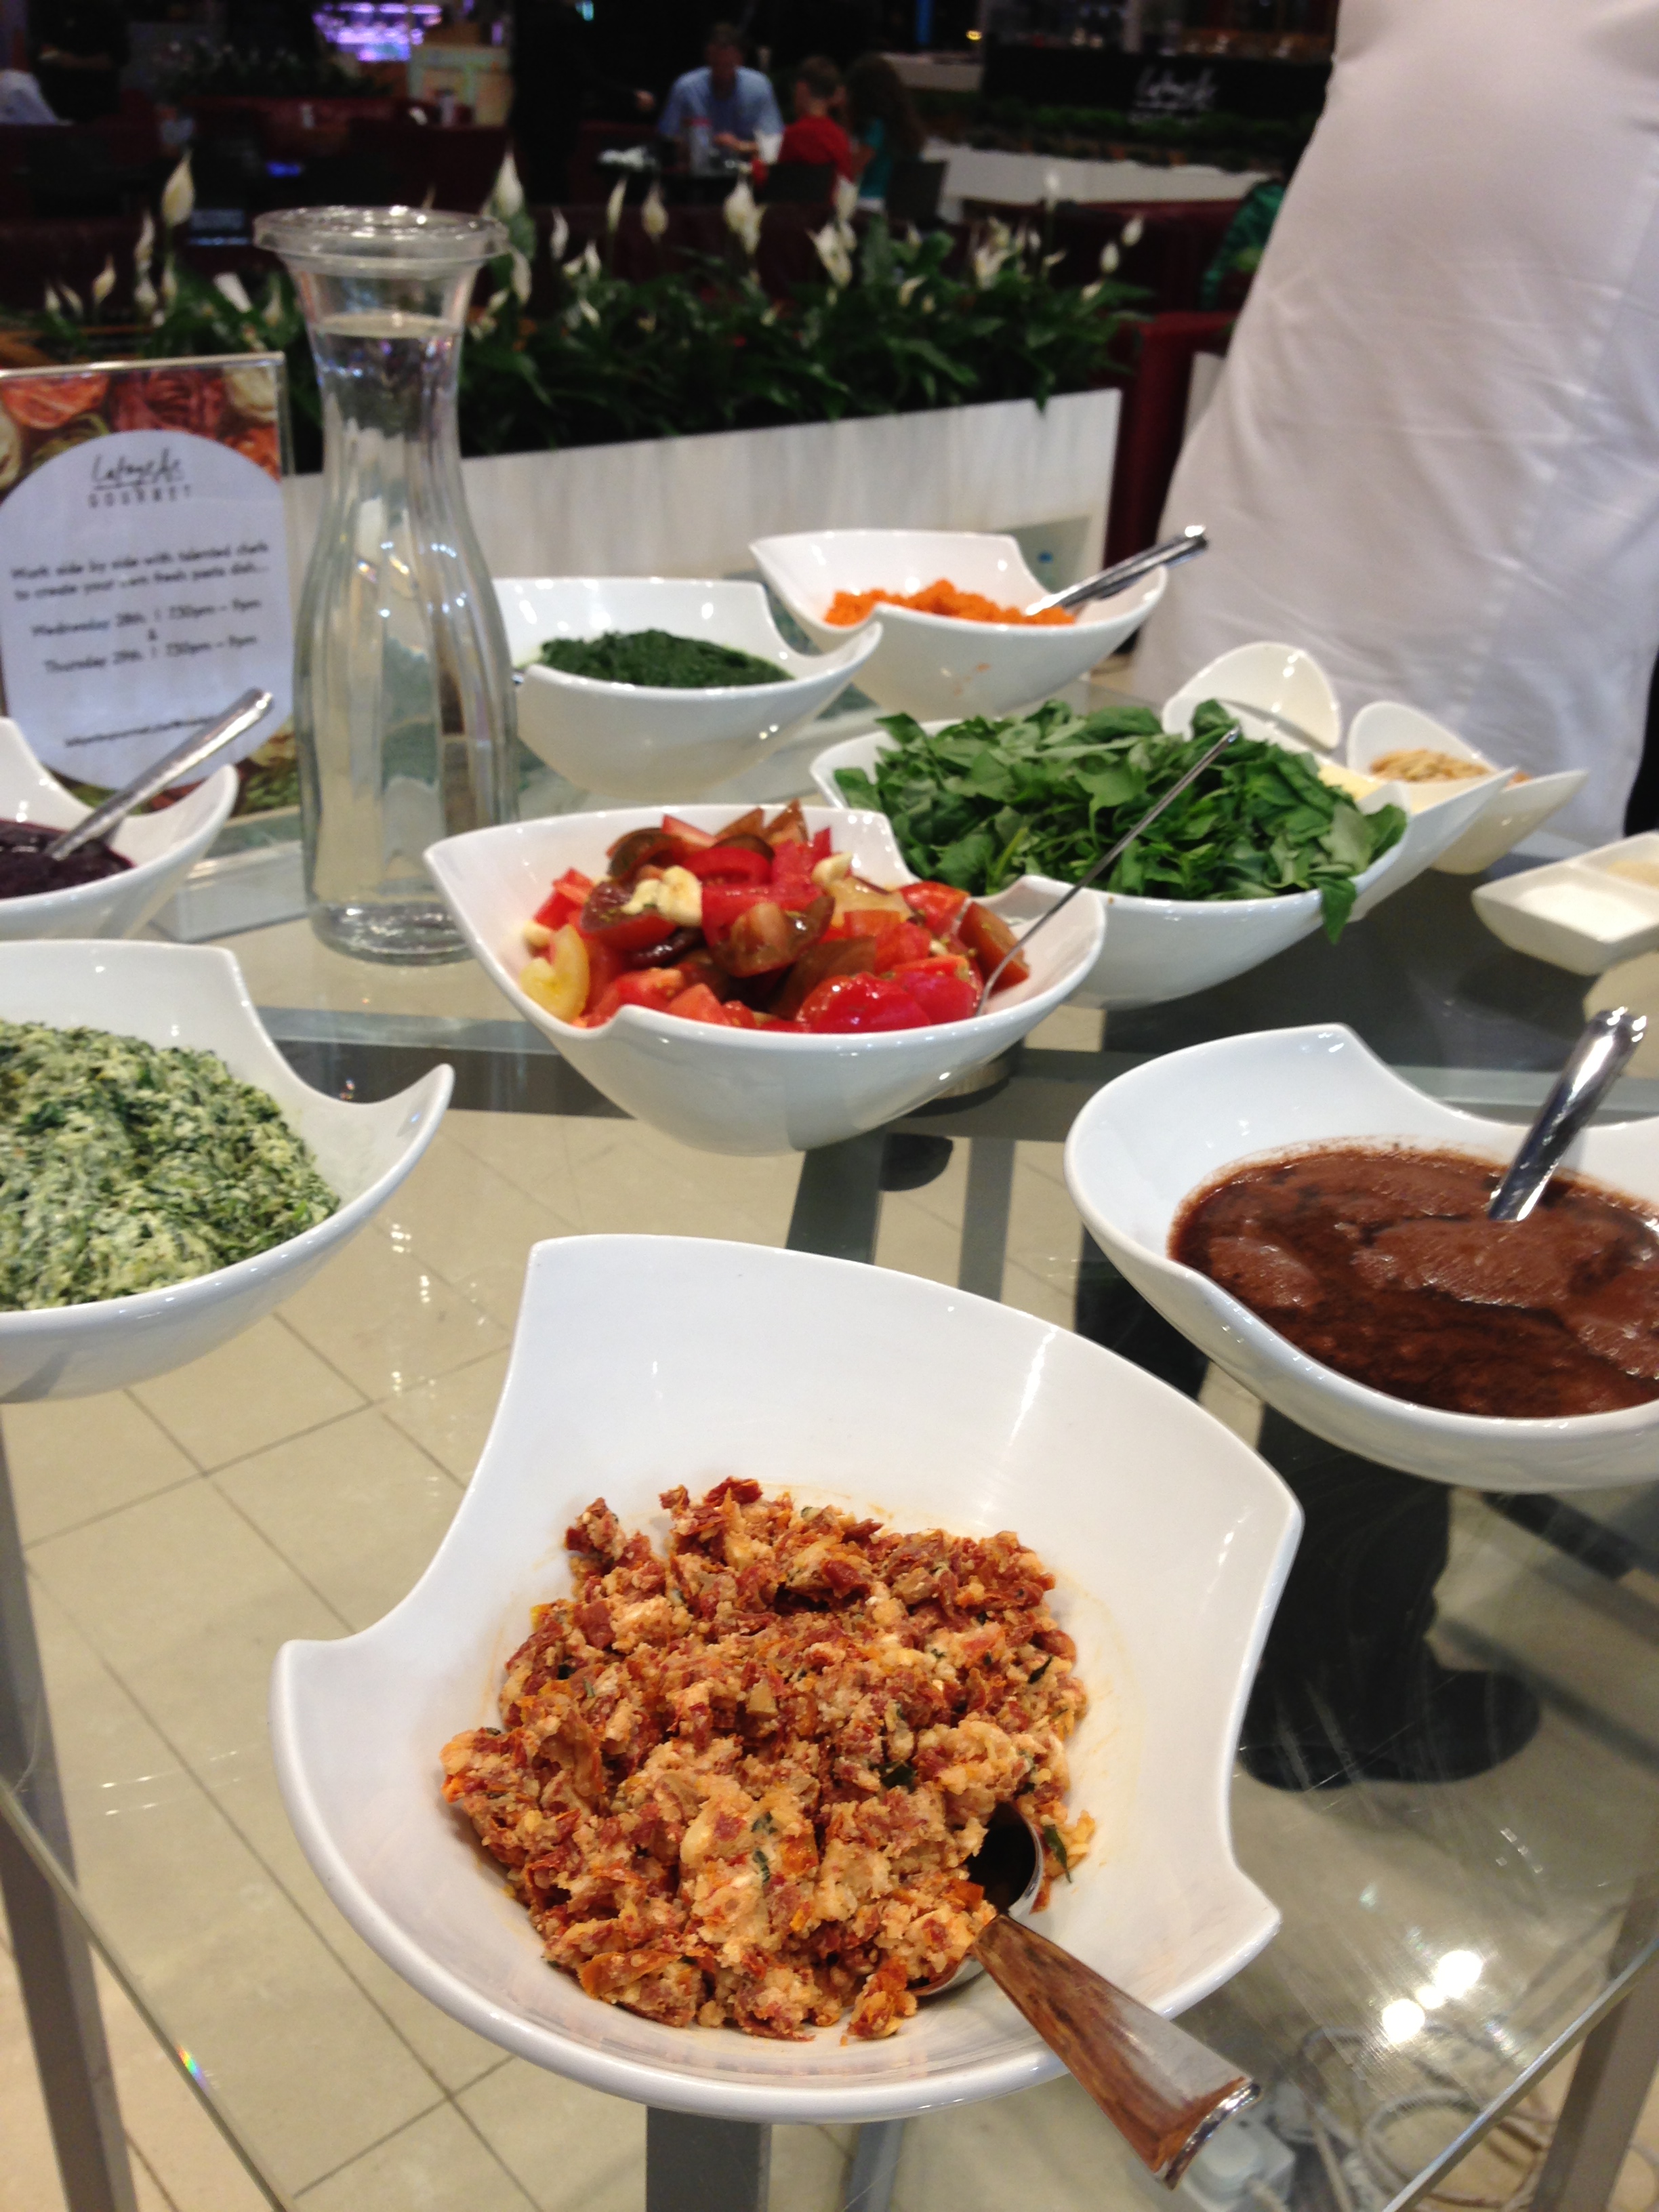
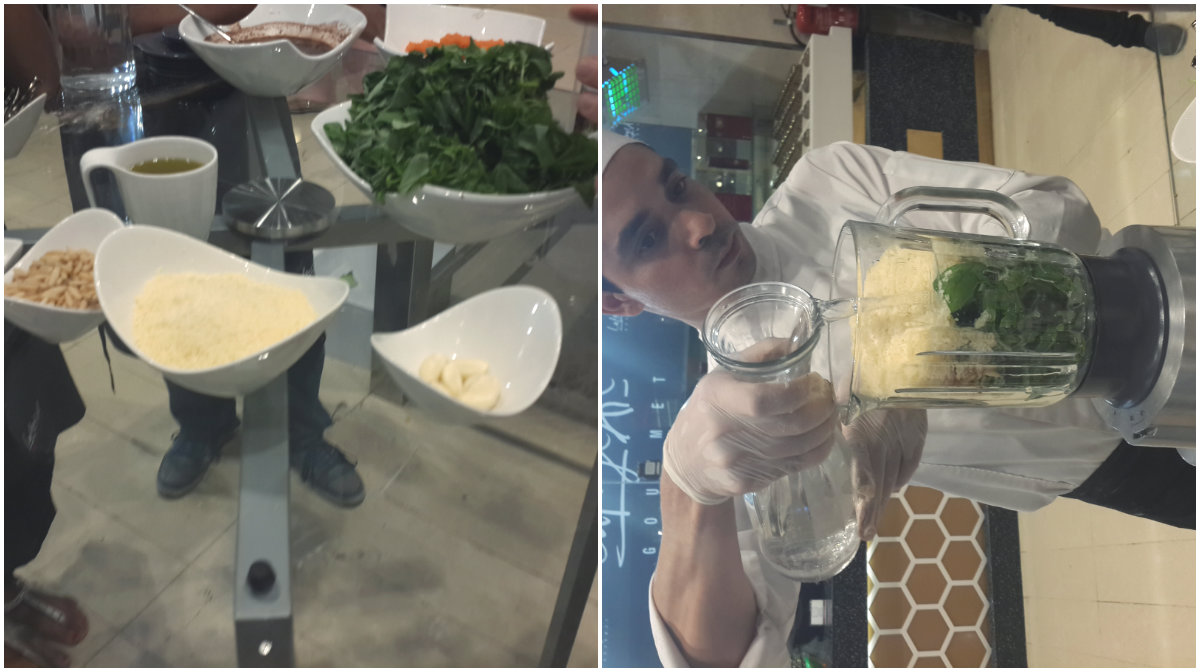
We then proceeded to see how the sauces are prepared. Chef demonstrated the basic pesto sauce and tomato sauce. He had marinated different types of tomatoes with garlic and some oil and let it rest for the flavors to seep in.

Tomato Sauce

The pesto was one of the nicest pesto I have ever tasted. The trick was to have more of water and less of oil said the Chef. Nonetheless the texture was creamy because of the parmesan cheese and the sauce was very fragrant and fresh.

Pesto

While the team sent the sauces to be used in the kitchen and the pasta to be dished out, Chef took us on an impromptu tour of the ingredients they retail in-store. We tasted different tomatoes, the Baby San Marzano, the Saveol Coeur De Pigeon. The latter was the juiciest tomato I have ever tasted. I also loved the Heirloom tomatoes on display looking very rustic.

Tomatoes

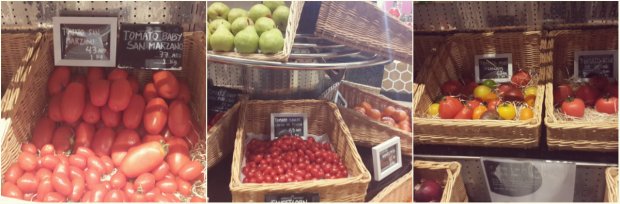
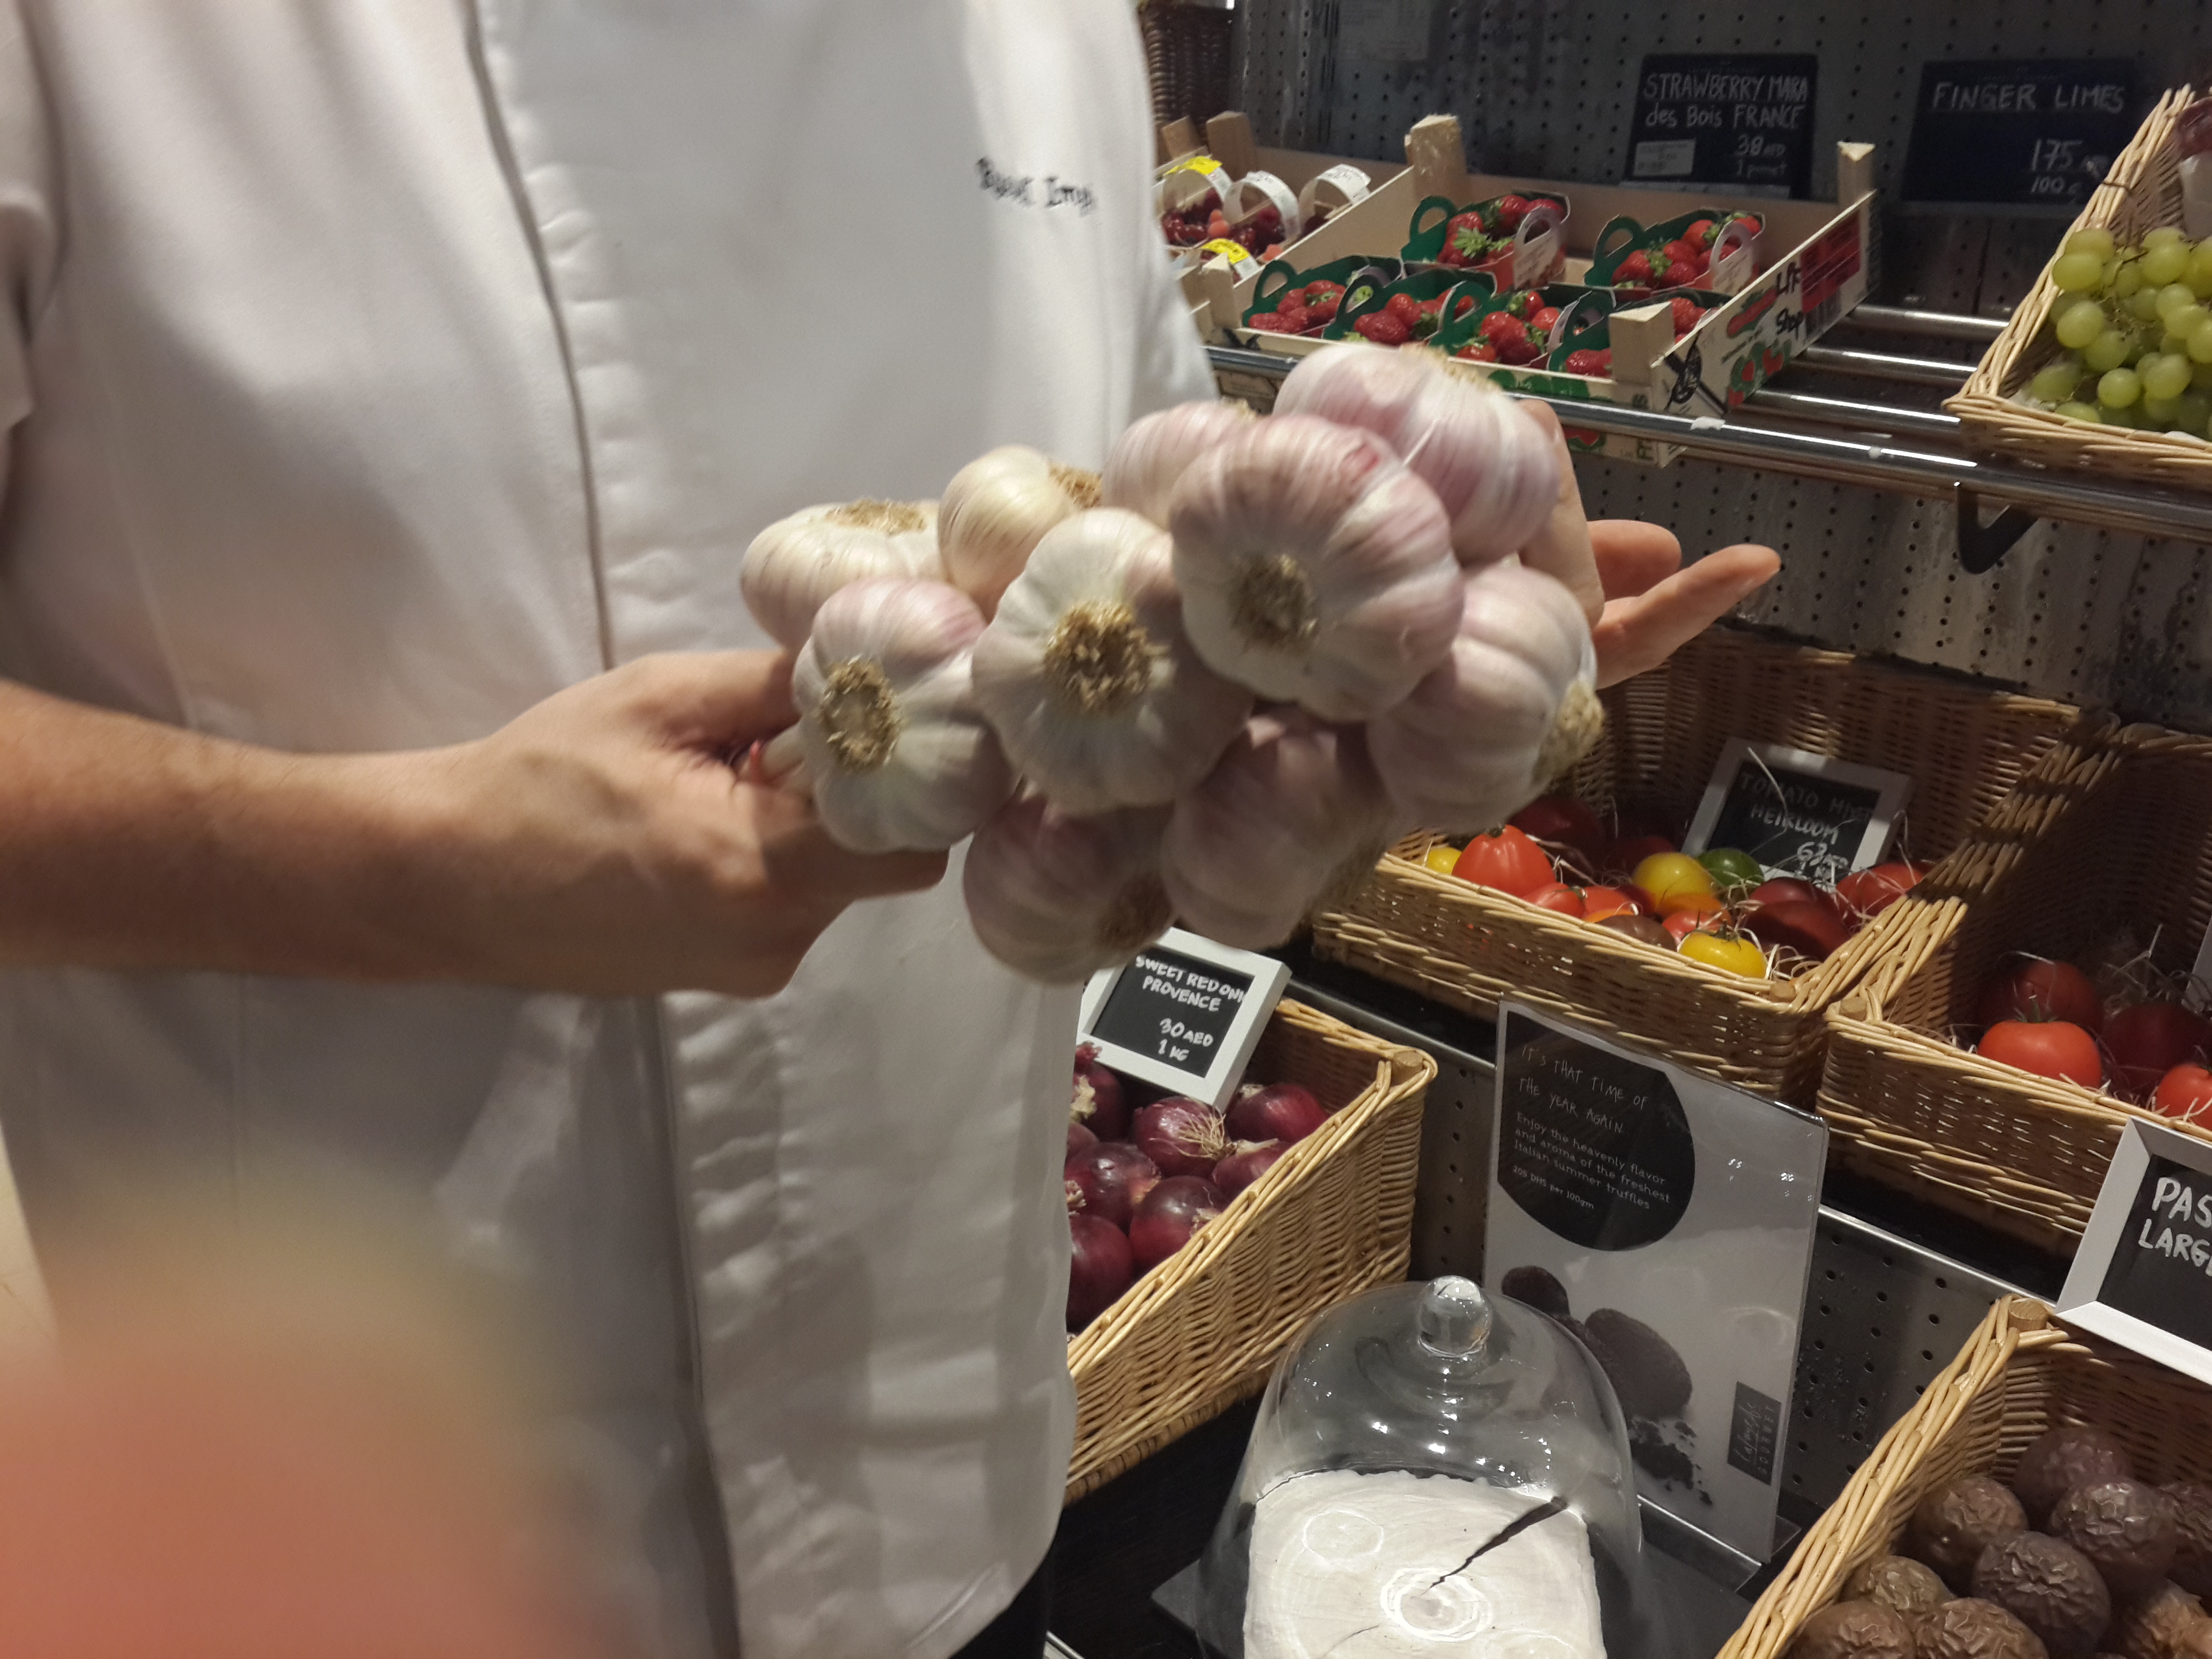
Chef also gave us quick lessons on how to pick tomatoes for sauces and how to peel and use garlic. I saw the most beautiful ever garlic, here see:

Garlic

He then introduced us to the different varieties of Balqees Honey on display. We tasted saffron infused, ginger honey and a whole lot of Yemeni honey.

Balqees

I especially loved the Yemeni honey, it had a wonderful after taste and felt very soothing.

Yemeni Balqees Honey

He also told us about different ways to use honey in bakes and salad dressings. He was all praises for the health benefits for honey as well.

After a couple of minutes was the most fascinating part of this cooking class, the tasting. We got to taste the pasta we had made once the Chef’s team had worked up their magic on them.

Tasting

So we started with Tagliatelle Pasta in Pesto sauce and Carrot Tagliatelle in Tomato sauce.

Tasting

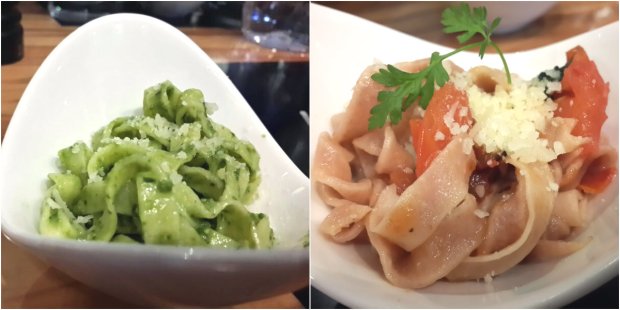
The Beetroot Ravioli came with toasted pine nuts and beetroot reduction and a garnish of fresh parsley. It was the prettiest of the lot.

Beetroot Ravioli

It was followed by the ooh-so-wonderful Spinach Ravioli just doused in butter and sage. This was so delicious I wanted more and kept craving for the rich buttery flavor even on days that followed.

Spinach Ravioli

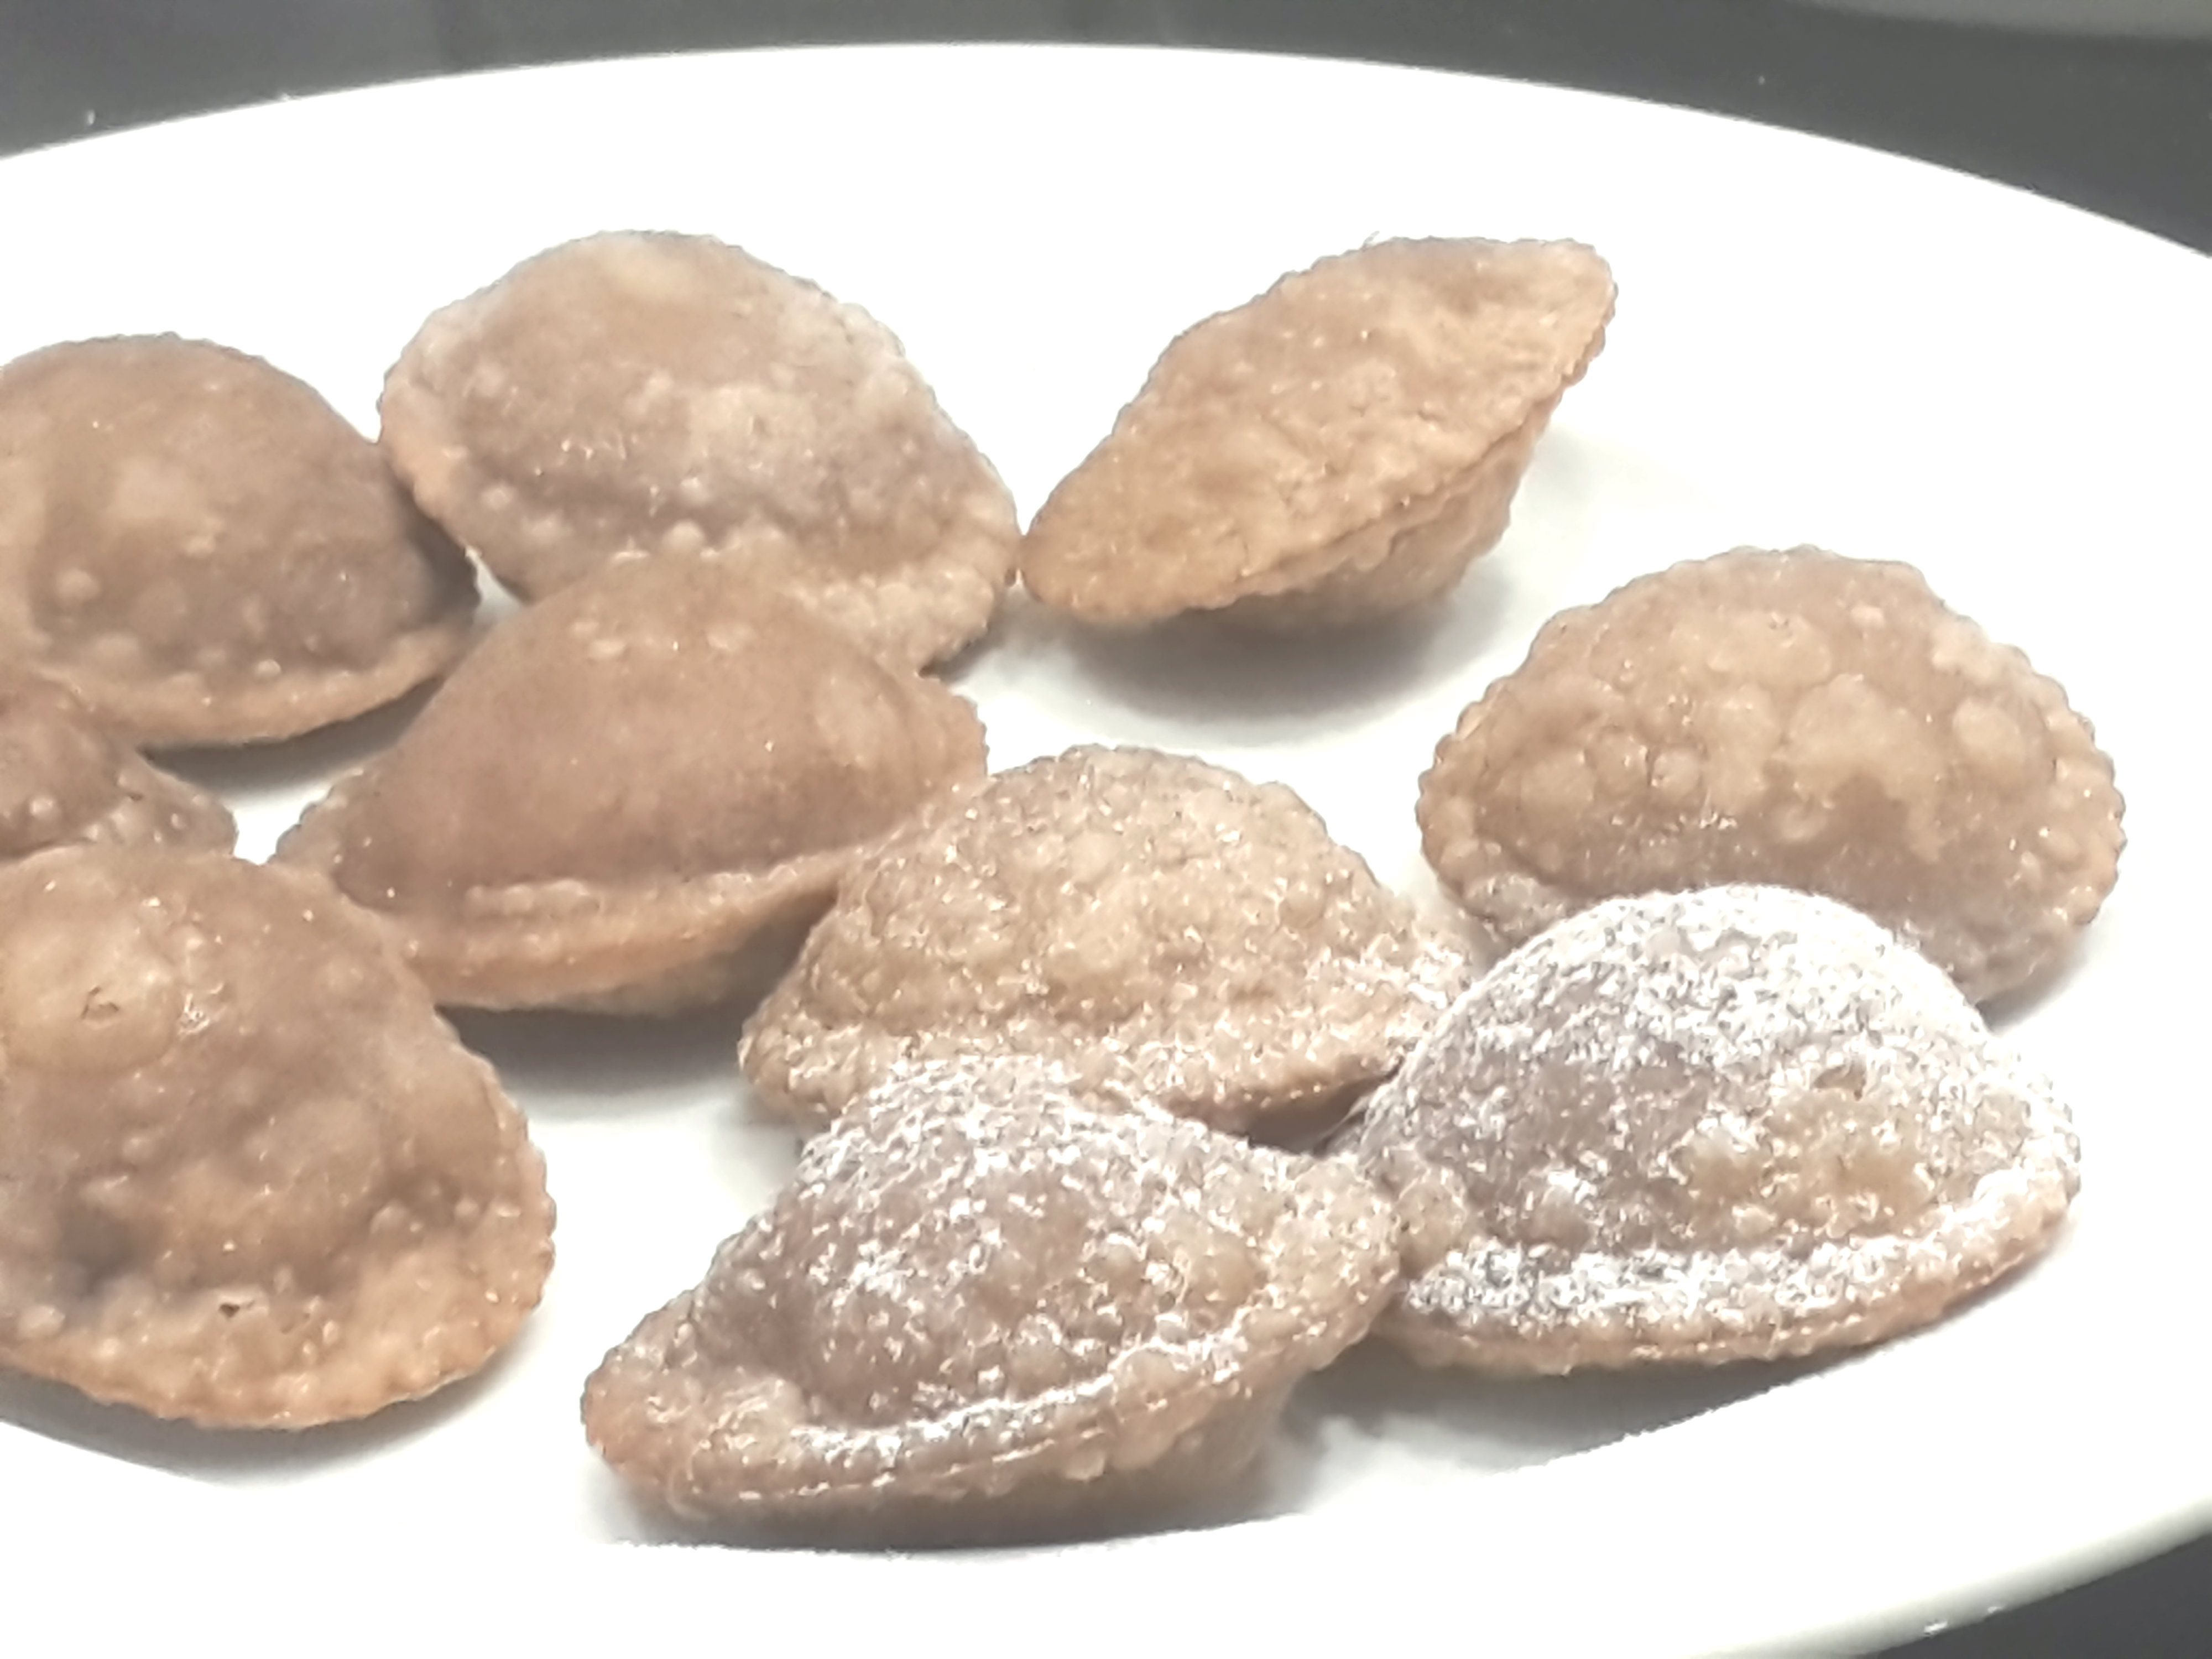
After catching up with the fellow participants and ooh-ing and aah-ing over the delicacies, we moved on for desserts. This was fun, chocolate ravioli deep fried just for close to 30 seconds, the result nicely puffed up beauties.

Chocolate Ravioli

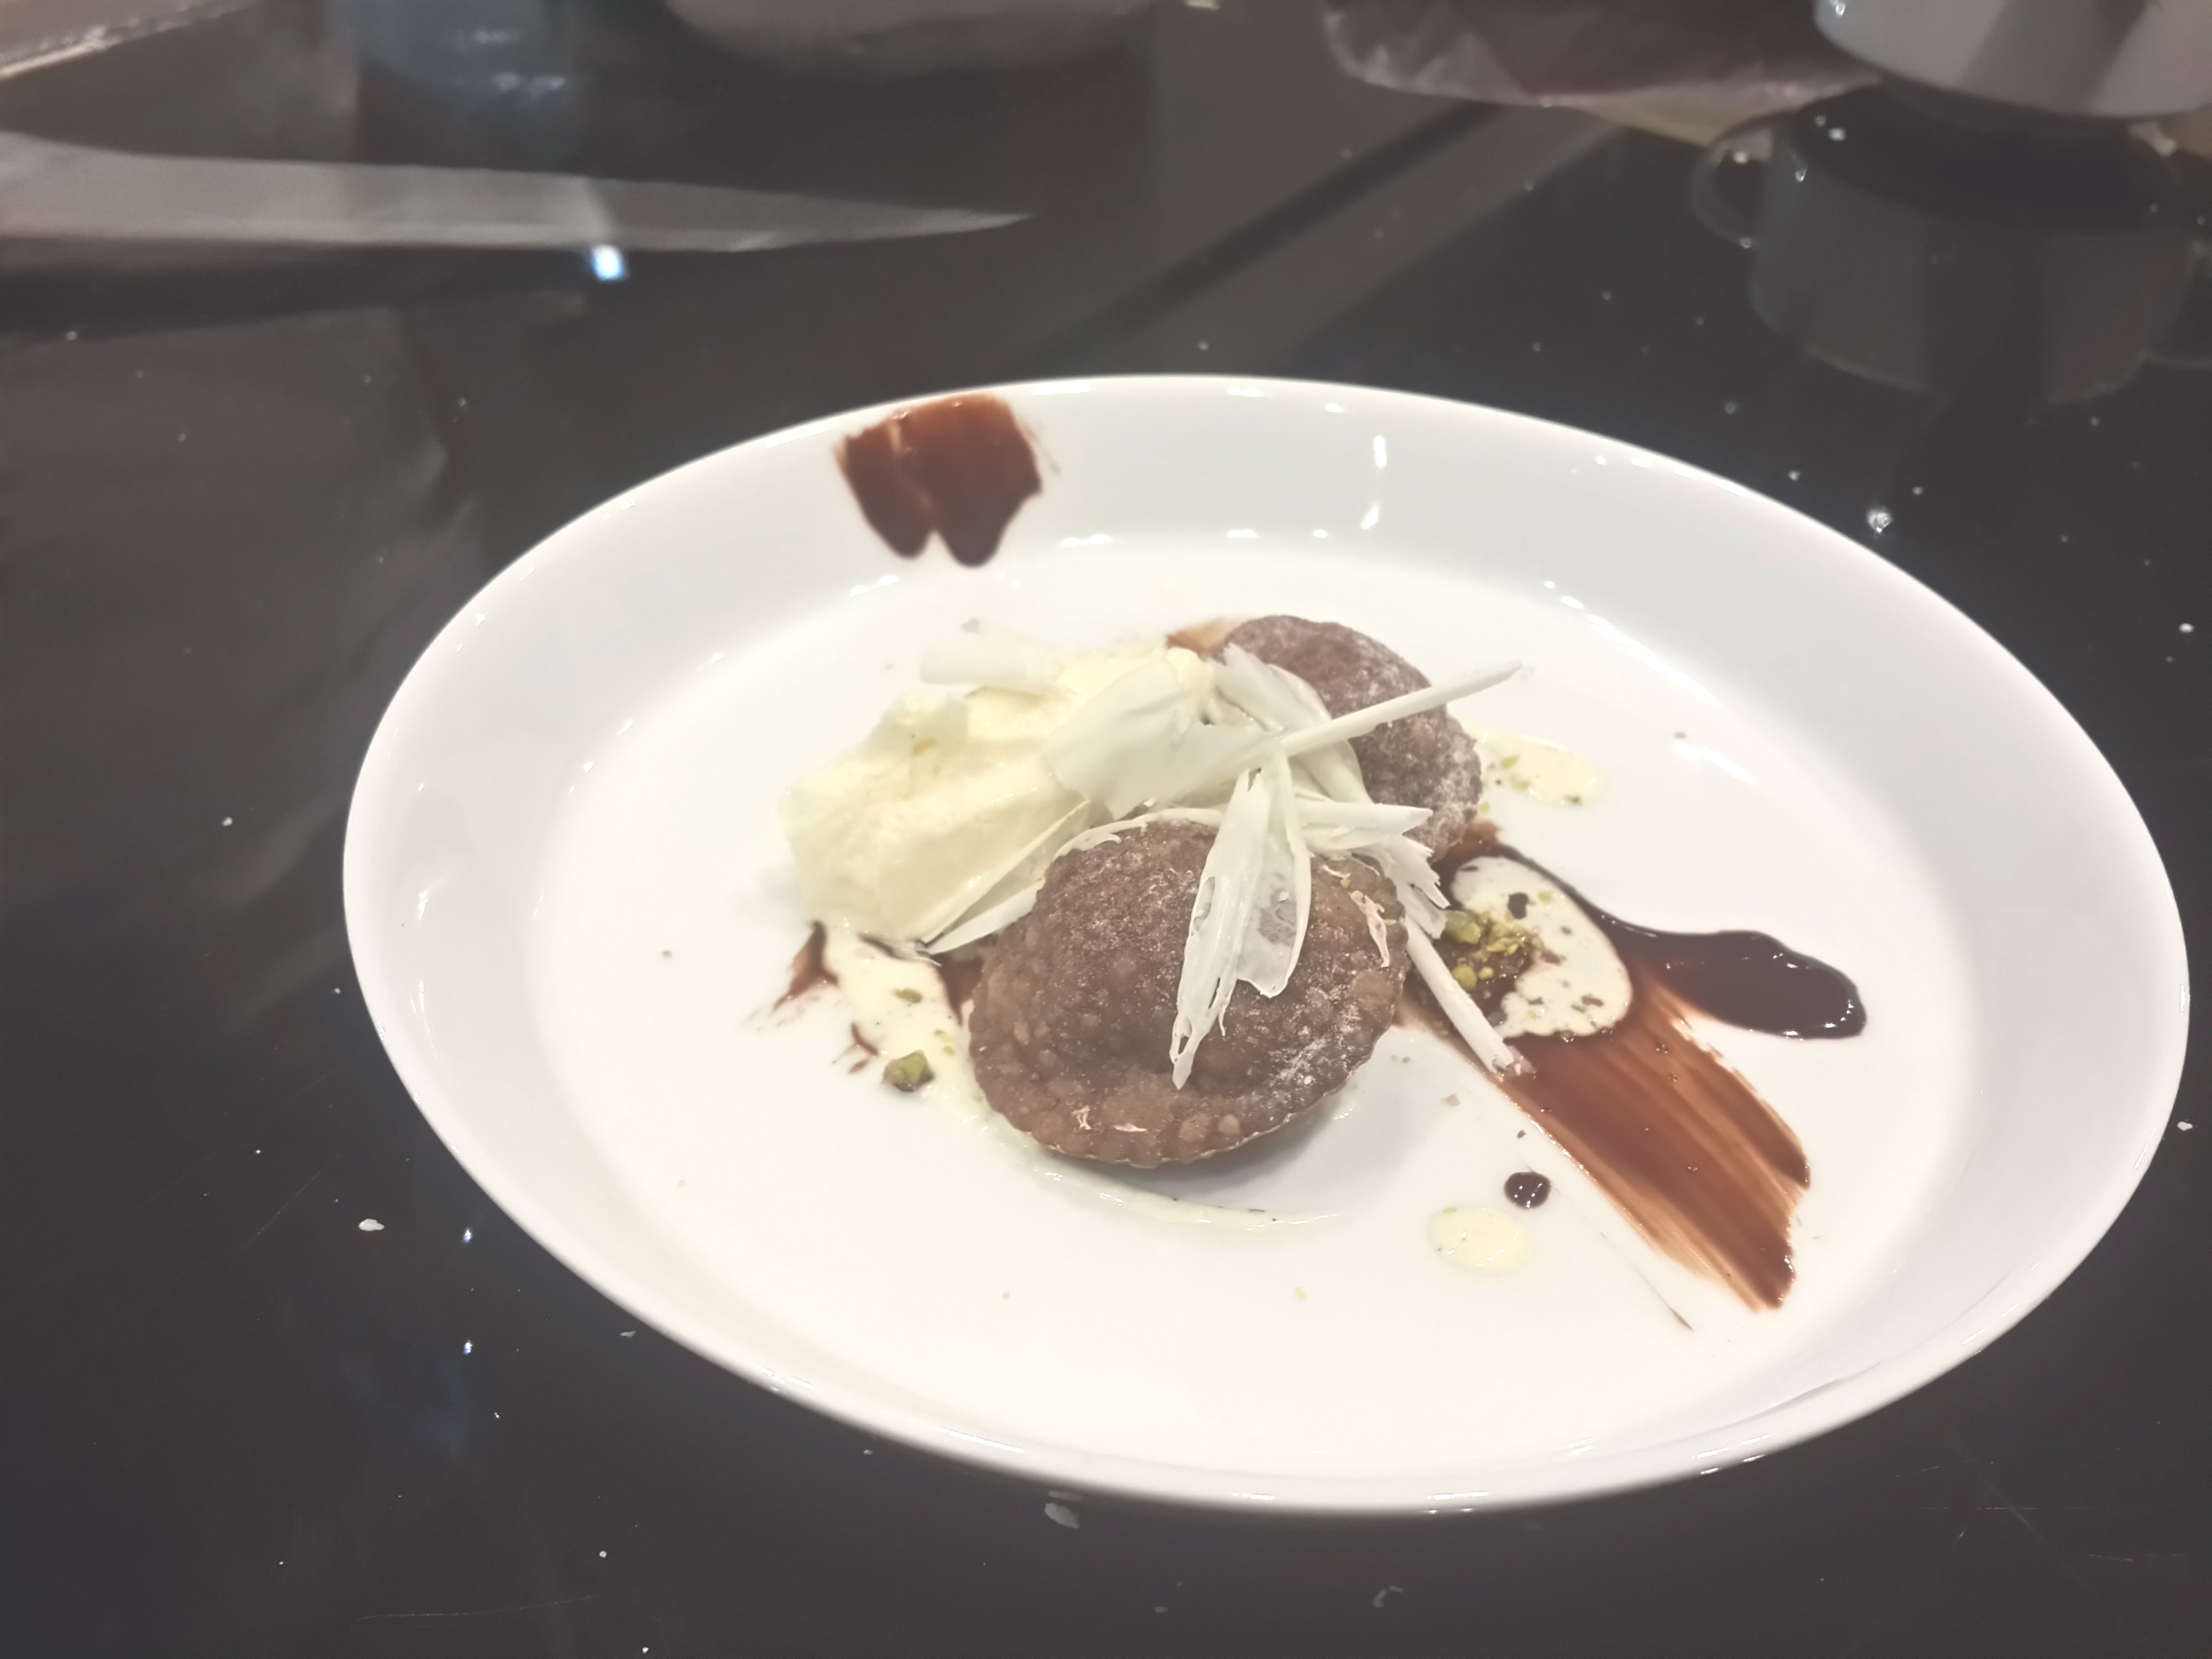
Chef showed us how to plate up a dessert. It was served with a smear of chocolate ganache, white chocolate sauce infused with vanilla bean topped with nuts, shredded white chocolate and ice cream. Chef also showed us a few easy techniques on how to get the shredded chocolate and quenelle the ice cream.

Dessert Chef

We plated up our individual portions. Mine was overdone, I went crazy with heaping the plate with a good dollop of ice cream and chocolate ganache.

Dessert1

That’s what I call Awesomeness on a plate, Sahil plated this and Chef declared his plate the prettiest. Win!

Sahil Dessert

I came back really happy after the interactive session and a hearty meal. We also got a copy of the recipes. I’m sharing it here so that it gets easy for all of us to try these at home.

Perfect Your Pasta

Perfect Your Pasta 1

I look forward today for the launch event of Lootah Premium Foods ‘ Meet The Blogger’  Event at Galeries Lafayette Dubai Mall wherein some of the best food bloggers from UAE will be giving a cooking demonstration and showcasing their recipes. The crowd will then be able to taste their delicacies.

This is a week long event week and there’s also a grand prize for 3 days in Mauritius at a stunning resort. This prize would be given to the person who captures the best picture of the event and puts it up on Instagram tagging #LootahPremiumFoods

Lootah

I’d be attending the launch event today and thereafter would see some of my fellow food bloggers in action! This should be super fun 🙂

Eggless Vanilla & Almond Crumble Cake

Almond Crumble Cake
After a long hiatus I’m back with something sweet. I visited my family back in Mumbai last month and spent 15 days of bliss in my room.  Surrounded by the similar sense of warmth and comfort which can be experienced, only when you sit cross legged on the couch, endless rounds of tea and snacks been passed around with family gossip sessions which go on for hours on end.
I planned this trip since I wanted to be there for my Dad’s birthday. I’m a typical daddy’s girl and he pampers me silly always. He is the one who still calls me and says ‘I Miss You, come back home soon’. He said this just before his birthday was approaching and it was enough to make me teary eyed and book my tickets. My dad has a terrible sweet tooth, one of the many things which I have taken on him.
He has border line high blood sugar but he still hasn’t restricted himself much in terms of popping the usual ladoos and halwas. His Punjabi genes are to blamed for the same, as a family we like our desserts way too much. I used to bake cakes for him before I got married off. See the one I baked him way back in 2010.
Dad Birthday Cake 2010
Last two years in a row I couldn’t bake him one and used to feel worse. So this time around, we were quite excited to bring in his birthday together.
I went armed with an oven (my mum never bothered to replace the old one once it went bad after I left) and a healthy cake recipe. I made him an Eggless Vanilla & Almond Crumble Cake. This recipe is adapted from Nita Mehta’s book – Eggless Desserts.
This recipe calls for no butter and very less sugar. You can up the sugar up to 1 cup if you like the cake on a slightly sweeter side. The texture for the cake will be moist and not too crumbly.
Today happens to my mum’s birthday, she turns the big 50 today. My mother is a compassionate person and a very confident lady, she is the life of every family get together and an agony aunt to the entire family. We can’t imagine our lives without her soothing smile. Here’s their picture taken on my wedding day.
Mum Dad
This post is a tribute to my parents, I am what I am because of the values they instilled in me and the life lessons they gave me. Sorry I get carried away when talking about family, moving on to the recipe 🙂
Almond Crumble Cake1
Ingredients
1  1/2 cups of all-purpose flour
1/3 cup almond crumble
2 tsp flaked almonds to garnish
1 cup of plain yoghurt
3/4 cup of sugar (powdered)
1/2 tsp of baking soda
1 and 1/4 tsp of baking powder
1/2 cup canola oil
1 tsp of vanilla essence
Preheat oven to 180 Degrees Celsius. Grease an 8″ cake pan with some butter, layer with baking paper on the base and set aside. Dust some flour on the sides of the cake pan so that the cake comes out clean once it is done.
Whisk the yogurt (at room temperature) well and add the sugar to it. Mix well until the sugar is incorporated well.
Sieve flour, baking powder and baking soda and mix well. Add this mixture to the wet ingredients.
Add vanilla essence and and oil. Fold it well and keep aside for 5 minutes for the baking powder and soda to start working it’s magic.
Pour half the batter in the greased cake pan and layer with the almond crumble mixture. Put the remaining the batter and sprinkle the remaining almond crumble mixture.
To make almond crumble, soak almonds in warm water for 30 mins. Dry them well on a kitchen towel and crush them coarsely in mortar and pestle. Keep the texture slightly coarse and crumbly. If you want a crunch to the cake, then slip the blanching step and instead just coarsely chop almonds or give them a quick blend in the spice grinder and do not soak almonds in warm water.
If you do not want to give the cake a layered look, then you can add the almond crumble to the batter and mix well.
Bake in the pre-heated oven for 30-32 minutes until the top turns a golden brown and a tooth pick inserted into the centre of the cake comes out with clean.
Let it cool down completely. I took the Orange Preserve from La Pain Quotidien for my parents and garnished it with the same along with chopped almonds once the cake was cooled. You can also serve it with any other preserve you like.
Almond Crumble Cake

I recently served this cake with raspberry coulis and garnished the cake with almond flakes, topped it with some fresh berries and it looked very pretty!

Almond Crumble Cake1
Serve with a smile!
p.s. A dear Twitter acquaintance tried this recipe the day I tweeted about this recipe. She has till date made this recipe thrice, makes me believe I did something right out here. Here are images which she shared, her little girls helped her make this. Ain’t it prettier than my pictures 😀
Cake

Chocolate Truffles

IMG_1574

I work at a fun company and any commercialized festivals or days get celebrated with quite a gusto. With half of the team who loves to eat, our lunch conversations are discussions about where we dined last night or which is the new place we should order office lunch from.

The Gifts

On Valentine’s Day this year, we had our version of Secret Santa and I got gifted a cookbook by a dear colleague. My love for cooking and cookbooks is well known in my co-workers. My subscriptions of BBC Good Food, BBC Housekeeping and Ahlan Gourmet land at my work place every month.

IMG_1528

I got gifted the “The Golden Book of Cooking” I love this since it stays true to the classics and the recipes have not been played around with.

I promised my colleague I would make him a sweet treat from the book and hence the truffles. I have adapted this easy to make and more easier to devour them. So one evening post work, we settled with our coffee mugs with Burj Khalifa (Yep! Flaunting)  as a backdrop and relished these bite sized treats.

IMG_1573

100 grams Lindt Milk Chocolate
100 grams Lindt Intense Mint Chocolate
200 ml Ellie & Verve Full Fat Cream
2 tsp unsalted butter

To Decorate:
1/4 cup Hersey’s unsweetened cocoa powder
1/4 cup Desiccated Coconut
1/4 cup Chopped Almonds / Flakes
1/4 cup Pistachio Slivers

In a saucepan, heat cream over medium heat and bring it a simmer.

On a double boiler, melt both the chocolates. You may want to coarsely chop the chocolate bars or simply break them with  fingers.

Once the chocolate is melted, add butter and cream mixture and blend well.

Adding butter to the mixture gives a nice sheen to the mixture. Take the mixture off heat and refrigerate overnight or for a minimum of 3 hours.

Use a melon ball scoop to make small balls. Grease your hands well with butter and shape the balls.

Coat the chocolate balls with descicated coconut, cocoa powder, almonds, pistachios, sprinkles or even with drinking chocolate.

Refrigerate the truffles for some time so that it acquires a nice form. This mixture gave me about 22 truffles to be precise.

The truffles would stay well for 3 days if refrigerated. You can also make them in batches and give this as favors to guests after dinner.

Sooji (Semolina) Halwa

The dish presented here is true blue Punjabi household recipe especially made on Ashtami, eighth day of Navrati festival where Goddess Durga is worshipped. Families fast for seven days and on the eight day morning, prayers are offered and the fasting ends by offering the Goddess with Sooji Halwa, Chana and Poori.

Wikipedia mentions that Navratri is a festival dedicated to the worship of the Hindu deity Durga. The word Navaratri literally means nine nights in Sanskrit, nava meaning nine and ratri meaning nights.
Apart from the festivities, Halwa is relished by Punjabi households along with Namak Ajwain Paratha (Indian flatbread rolled with clarified butter and seasoned with salt and carom seeds) and Aloo Jeera (Potatoes cooked with cumin seeds and dry masalas) as breakfast. It is a wholesome meal in itself. Now this actually amounts to having breakfast like a king.

1 cup rawa/ sooji/ semolina
1 cup sugar
3 cup water
1 tsp eliachi powder
10 cashews
20 almonds
10 pistachios
10 raisins
75 ml clarified butter

Prep Time : 5 minutes
Cooking Time : 25 mins

In a non-stick pan, dry roast semolina for 2 minutes on low heat until it acquires a pale golden color. Please ensure that you keep stirring the semolina so that it does not get burnt or a brown color.

In a saucepan, heat water on medium heat and add sugar and crushed cardamoms. Adding the elaichi to the sugar syrup makes it fragrant and allows the sugar to blend in the cardamom flavors. It remains subtle yet present in every morsel.

Now in a Kadai (thick bottom wok) on low heat, take the clarified butter and add the roasted semolina to it. Keep cooking the semolina in the ghee until it have a golden color. Keep stirring it continuously, it usually is good after 7-10 minutes.

Add the crushed nuts, to give a good body to the halwa. Ensure that you crush the nuts in a traditional motor and pestle.

Add the sugar syrup to the mixture. Be careful with this step and ensure that the burner is on low heat since the syrup will start to bubble and will sprinkle all over.

Blend in all of the mixture with the sugar syrup evenly and keep folding the mixture so that it does not stick to the bottom of the saucepan.

Another 5 mins and Voila!! your yummy treat is ready to be served to a hungary lot or to simply please the deities.

We had a South Indian family as our close family friend, they used to soak saffron strands to 2 tsp of warm milk and once the saffron flavor was dissolved, it was added along with the sugar syrup to the semolina. It is a popular dish from South India known as ‘Rava Kesari’. I intend to cover it here sometime soon.

Rava Nariyal Ladoos

I’d like to begin this post by wishing everyone a Belated Happy Diwali. I hope it is a good year filled with fun times ahead.

With Diwali nearing, every Indian household kitchen buzzes with energy. Homes are cleaned, utensils are scrubbed and cleaned, dryfruits are stocked up and savories and sweets are made days before the festivities begin.

My childhood memories include having Mathri, Shakkarpaare, Namakpaare, Pooris, Chakli, Gujiya, Besan Badam Barfi, Kaju Katli and Sooji Ladoos being made painstakingly by my grandma and Mom. I was assigned the task of crushing dry fruits, cutting the shapes for these goodies.

I loved how after sweating for hours on end while making these sweets and savories, it was relished with gusto by the ladies over a cup of masala chai. Ahh Bliss!!

I usually try and make these while going back home for Diwali. Last year I managed to make Mathri, Besan Badam Barfi and Ladoos. Being jobless helps at times. This year though I was just able to make some ladoos. Here’s sharing the recipe for them. Excuse the images taken by my humble iPhone4S camera 4.30 in the morning before my flight.

                                                                                        Rava Nariyal Ladoo

Ingredients

2 cups semolina
1 and half cup powdered sugar
1 cup dried coconut powder
1/2 cup almonds
1/2 cup pistachios
1/4 cup cashew kernels
50 ml condensed milk
1 tsp cardamom powder
1/4 cup raisins
200 ml clarified butter

Dry Roast semolina on medium heat until it acquires a pale golden color.Ensure that it does not stick to the pan or get burnt.

Allow it cool down and powder the semolina slightly. In a saucepan, add around 3/4th of the clarified butter on low heat and add the powdered semolina and cook for 15-20 minutes until it is a beautiful golden color.

Add cardamom powder and powdered sugar and mix well for another 2-3 minutes. Keep stirring the mixture continuously, if you feel that you need to add more clarified butter add another 2tsp. Up next add the dried coconut powder and crushed dry fruits.

In a different pan, heat 1tsp of clarified butter and add raisins to it. Cook it for 1 minute and it will bloom and this step enhances the flavor of raisins in the ladoos. Add the raisins to the mixture. Blend all the indregeints well and take it off heat. Allow it to cool for a couple of mins.

This recipe should give you close to 36 ladoos.

Now grease your palms with little clarified butter and start making ladoos. You will be required to apply pressure and lightly roll the mixture. Heap dessicated coconut powder in a plate and roll the ladoos lightly. You can place the ladoos at room temperature in cute looking paper cups. Garnish them with nuts. I have garnished them with pistachios since the green looks lovely against the pale white/ off white of the ladoos.

If the mixture does not stick well, heat around half a cup of full fat milk and add the same to the mixture and blend well. You can avoid adding milk as it decreases the shelf life of the ladoos. The ladoos stay well for a week’s time if kept in an airtight container.

If milk is not added then usually the ladoos last for around 15 days unless they get polished off the plates earlier!!